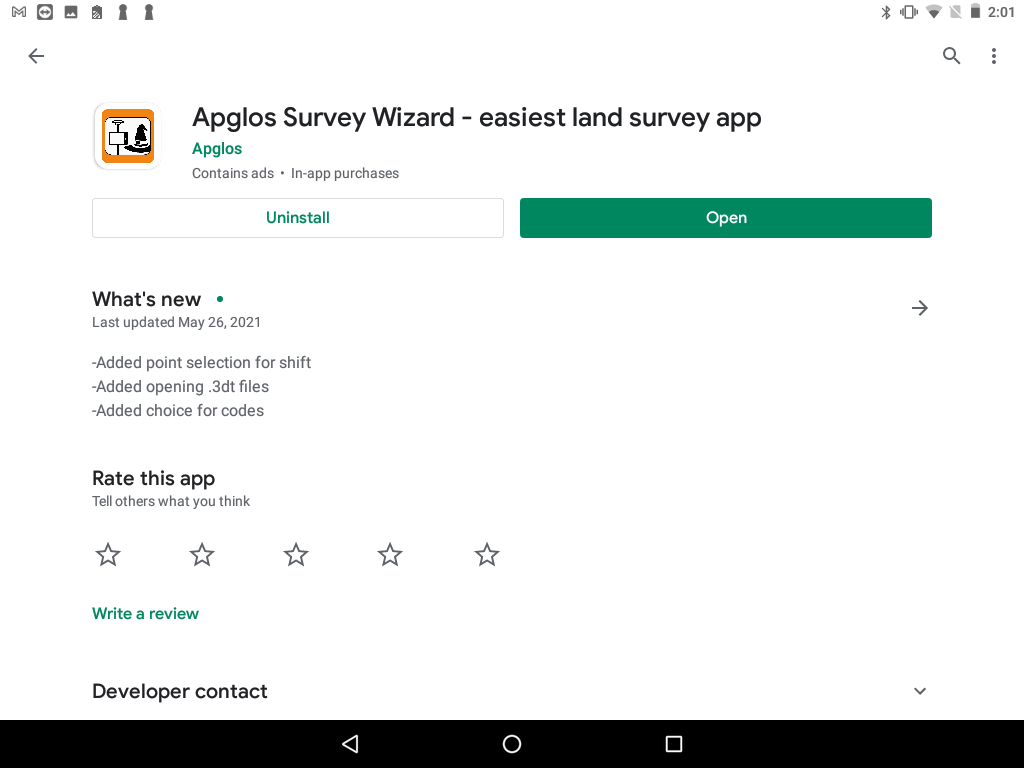
You can install the Aplos Survey Wizard in the app store on your device by following the next steps:
1. To install the Apglos app, open your (Google) Playstore and search for: ‘Land survey app’.
2. Search for the Apglos Survey Wizard and download the app. Once the app is downloaded you can open the app and directly start the survey.
By starting up the Apglos Survey Wizard your register screen appears.
1. Click on the ‘Sign up for free’ button to register. When you are already registered, please move forward to the next chapter and log in.
2. Enter the email address you want to use to register and read and accept the general conditions.
3. Click the ‘Register for free’ button to register.
4. You will receive your password in your e-mailbox.
(When you did not receive any notification, please contact us)
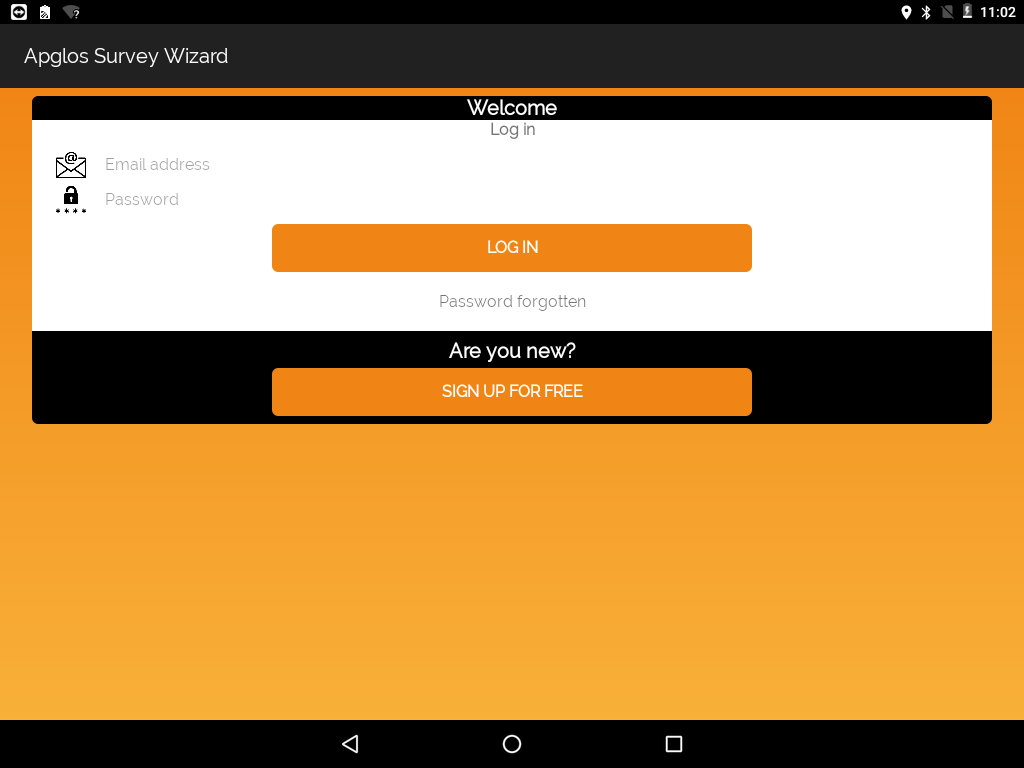
After you have registered, you can log in at the Login screen following the next steps:
1. Enter the e-mail address you used to register.
2. Enter the password you have received on your e-mail address.
3. Click the ‘Login’ button to confirm.
4. Now you are logged in.
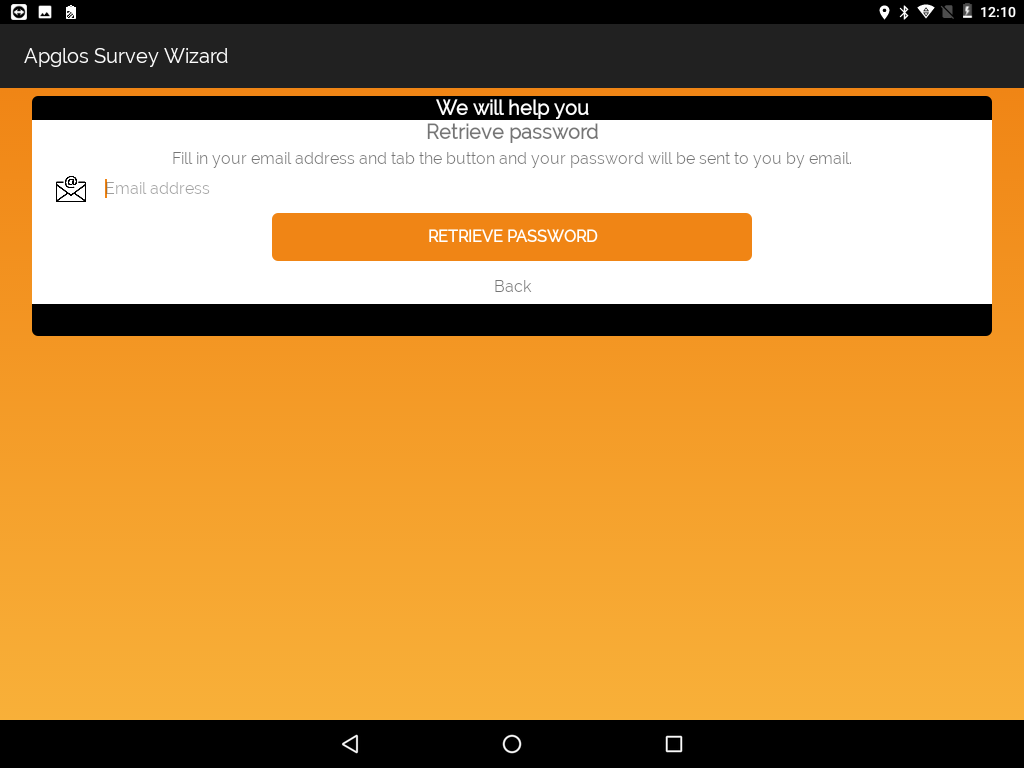
Forgot your password?
When you have forgotten your password, just go to ‘Password forgotten’ and fill in your e-mail address and click on the ‘Retrieve password‘ button.
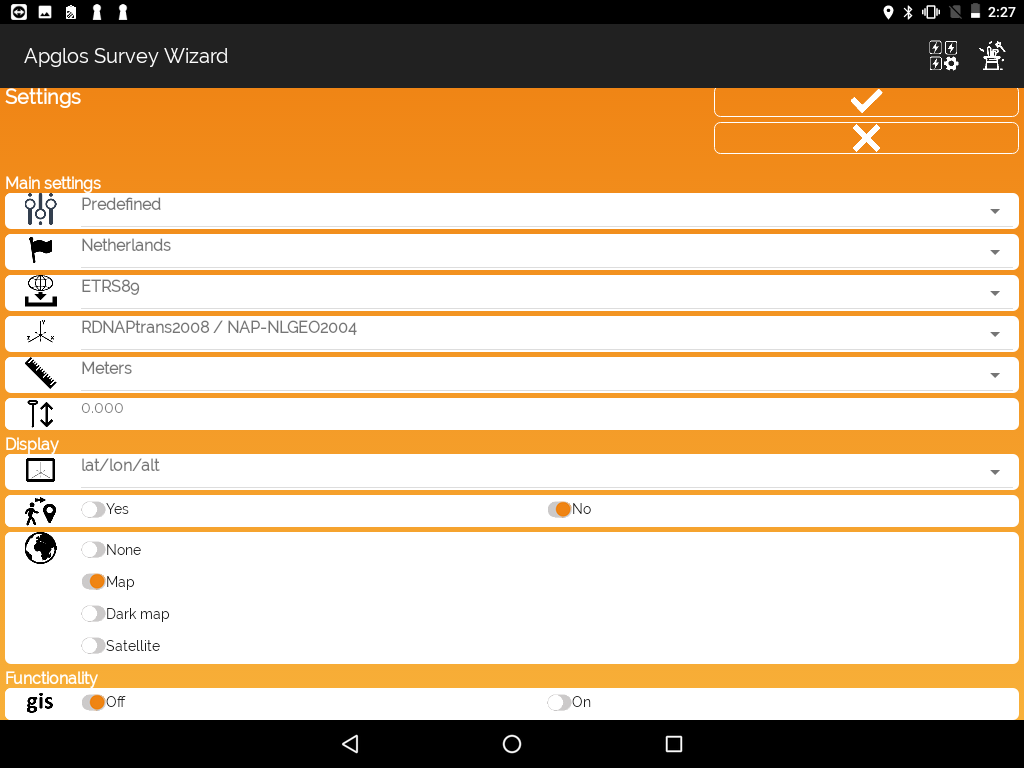
You can change the coordinate reference system in the Setting screen through following the next steps:
1. Click the ‘File menu‘ button. ![]()
2. Click the button ‘Other settings’. ![]()
3. Please fill out the menu starting by the top option:
– Select your choice for a predefined system.
– Select the country which you are in, for the land survey.
– Choose the ellipsoid.
– Select the coordinate system.
– After entering these options there is a cloud on the top right of the screen, with an arrow inside. Click on the cloud to download the coordinate files.
– Click the V-button to accept your changes.
4. The coordinate reference system is changed now.
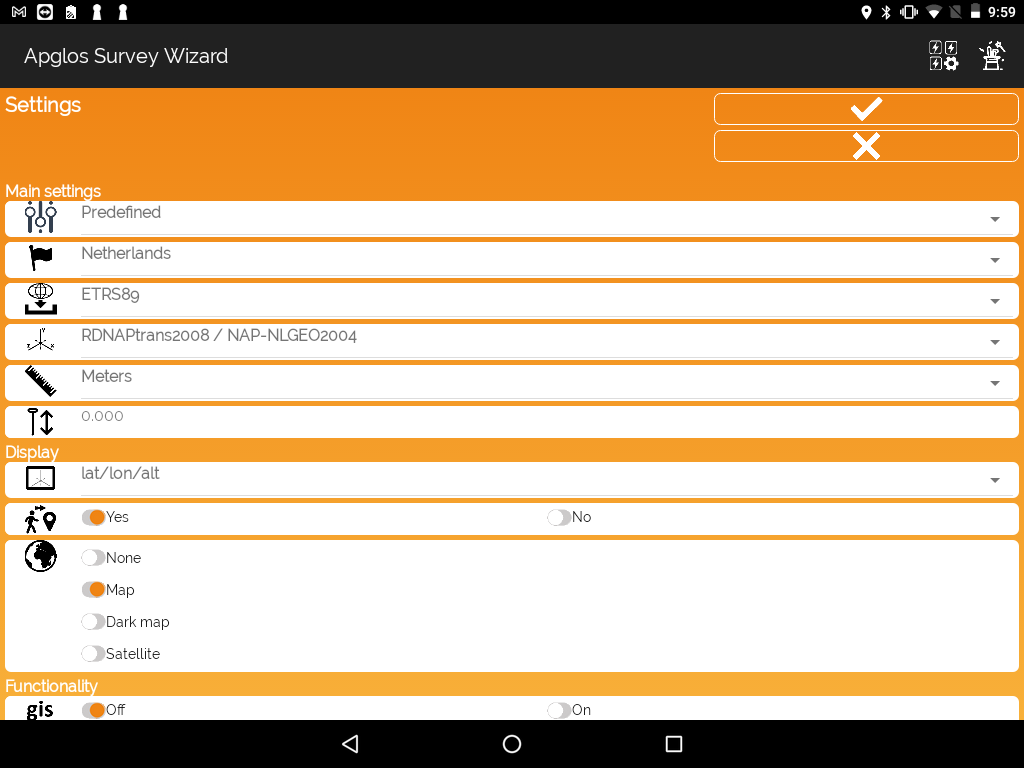
For land survey you need to use the units which are comment for your country. This is why you need to change the measurement units. You can change the measurement units in the setting screen through the next steps:
1. Click the ‘File menu‘ button. ![]()
2. Click the button ‘Other settings’. ![]()
3. Enter the unit which belongs to your country next to the < meter icon> icon.
4. Now your unit has been adjusted.
We identify a position by 3 elements, namely the X-, Y- and Z- coordinates. Also defined as “northing, easting and elevation”. The X-, Y- and Z-coordinates are selected in the coordinate reference system. The Z-coordinate needs to be configured by the antenna height. You can change the antenna height in the setting screen by the next steps:
1. Click the ‘File menu‘ button. ![]()
2. Click the button ‘Other settings’. ![]()
3. Click on the numbers next to the icon ![]() . The antenna height screen appears:
. The antenna height screen appears:
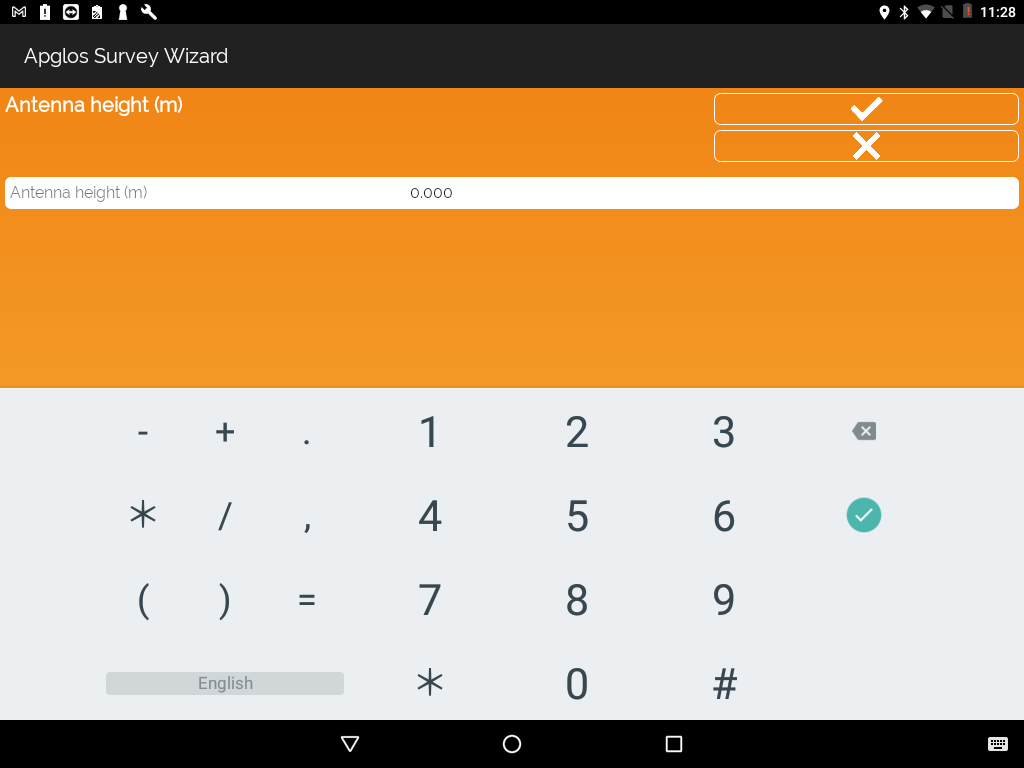
4. Enter the antenna height by clicking on 0.000.
5. Click the ‘V’ button in the antenna height screen.
6. Click the ‘V’ button in the settings screen.
Your antenna height is adjusted.
You can add an external GNSS receiver in the connection screen. Add the external GNSS receiver by following the next steps:
1. Click the Connection menu button. ![]()
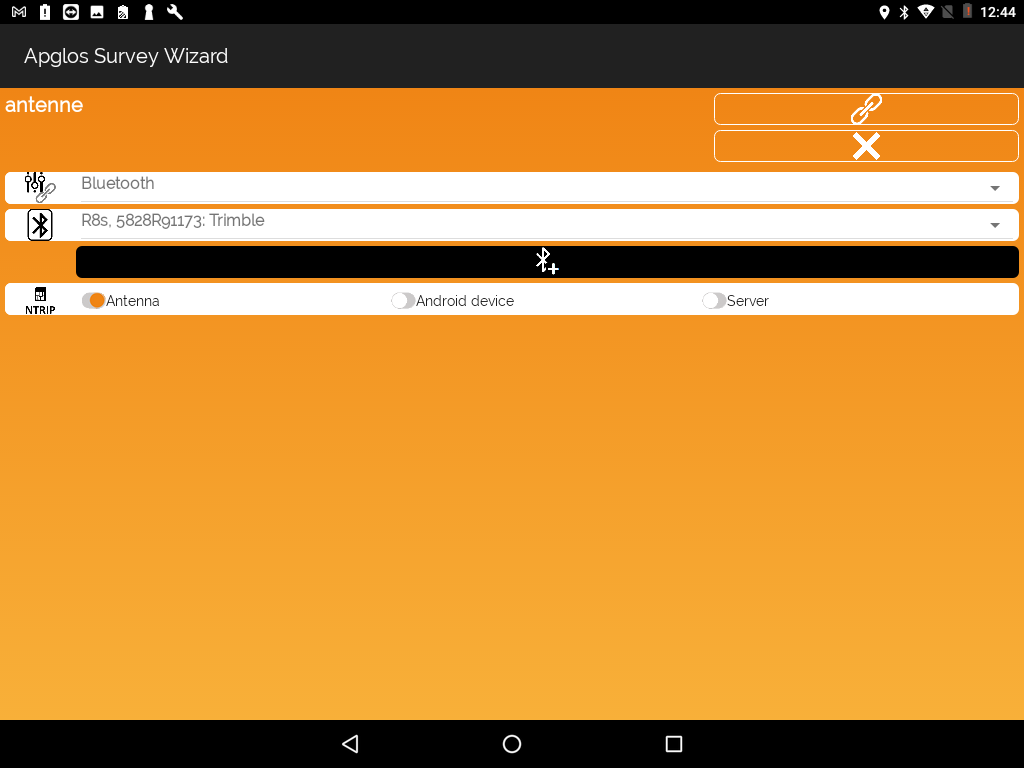
2. Click the button ‘Connect’. The connection screen appears:
3. Make sure the external GNSS receiver is paired with an Android device.
4. Click the black button to add the Bluetooth device.
5. Apglos Survey Wizard will ask you to allow your tablet to be visible to other devices for 120 seconds.
6. Click ‘Allow‘ and Apglos will search for any nearby Bluetooth devices.
7. Select your Bluetooth device and click ‘OK‘.
8. Now you can select your Bluetooth device in the list next to the icon ![]() in the connection screen.
in the connection screen.
You can to the external GNSS receiver with direct corrections by the following steps:
1. Click the ‘Connection menu‘ button. ![]()
2. Click the button ‘Connect’. The connection screen appears:
3. Select the GNSS receiver you want to connect with.
4. Next step is to select ‘Antenna’.
5. Click the ‘Connect’ button ![]() .
.
6. When the GNSS receiver receives enough satellite signals you are able to get a RTK fix.
You can fill out the NTRIP data in the connection screen. Enter the NTRIP data by the following steps:
1. Click the ‘Connection menu‘ button. ![]()
2. Click the button ‘Connect’. The connection screen appears:
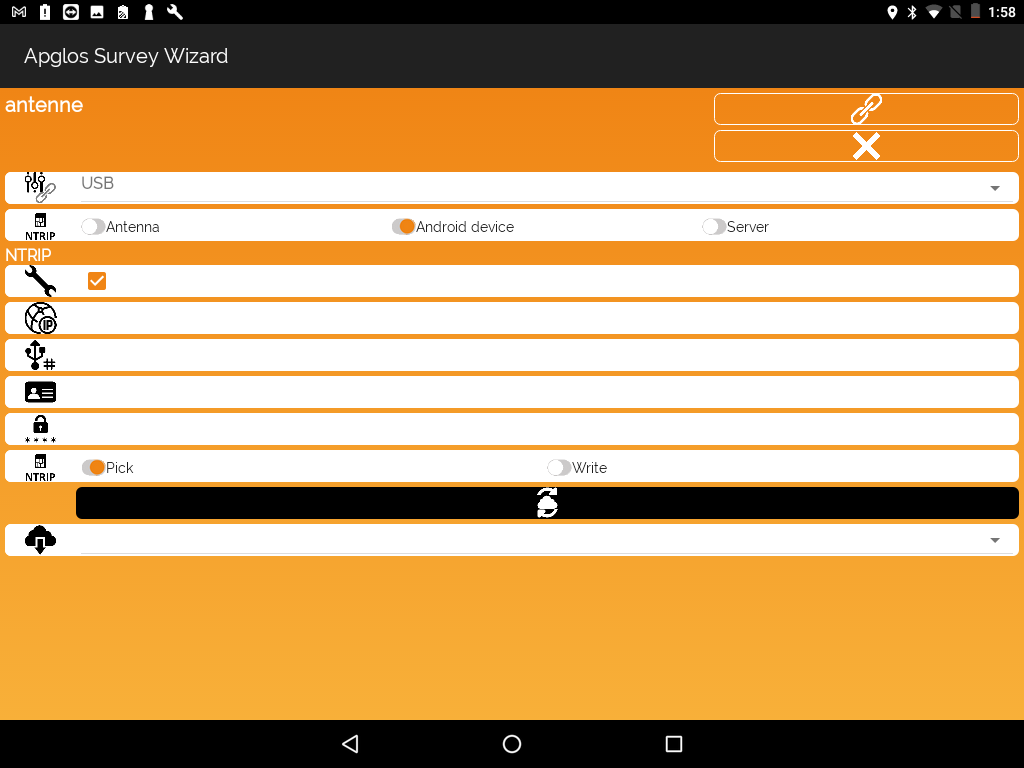
3. Fill out the form you see above, from top to bottom, when Android device is selected:
3a. Select Android device in the NTRIP selector ![]() .
.
3b. Select the box next to the ![]() for correcting the NTRIP data.
for correcting the NTRIP data.
3c. Click next to the IP icon ![]() to enter your NTRIP IP-address.
to enter your NTRIP IP-address.
3d. Click the ‘V’ button to confirm.
3e. Enter the port next to this icon ![]()
3f. Enter the username and confirm by clicking on the ‘V’ button.
3g. Enter your password next to this icon ![]() and confirm by the ‘V’ button.
and confirm by the ‘V’ button.
3g. Select ‘Pick’ when you want to download a mountpoint and click the black button to confirm.
3h. Select ‘Write’ to fill in the mountpoint yourself.
3i. Now you can select the required mountpoint.
You can connect to a GNSS receiver with sending and receiving NTRIP corrections in the connection screen by following the next steps:
1. Click the ‘Connection menu‘ ![]() button.
button.
2. Click the button ‘Connect’. The connection screen appears:

3. For connecting to a GNSS receiver with sending and receiving NTRIP corrections you need to select ‘Android device‘.
4. Enter the NTRIP data when NTRIP data are not filled in yet. For instructions about entering NTRIP data, click the entry above this item: How to enter NTRIP data.
To start land survey, you have to give your object a name, so you can recognize your object in the mapping file. To name your object you need to make a layer.
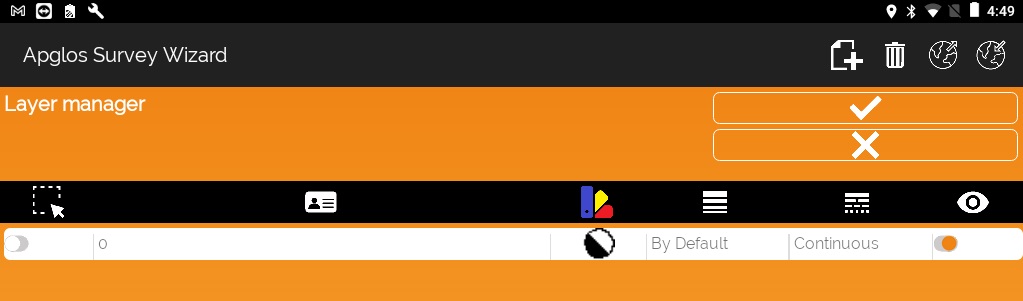
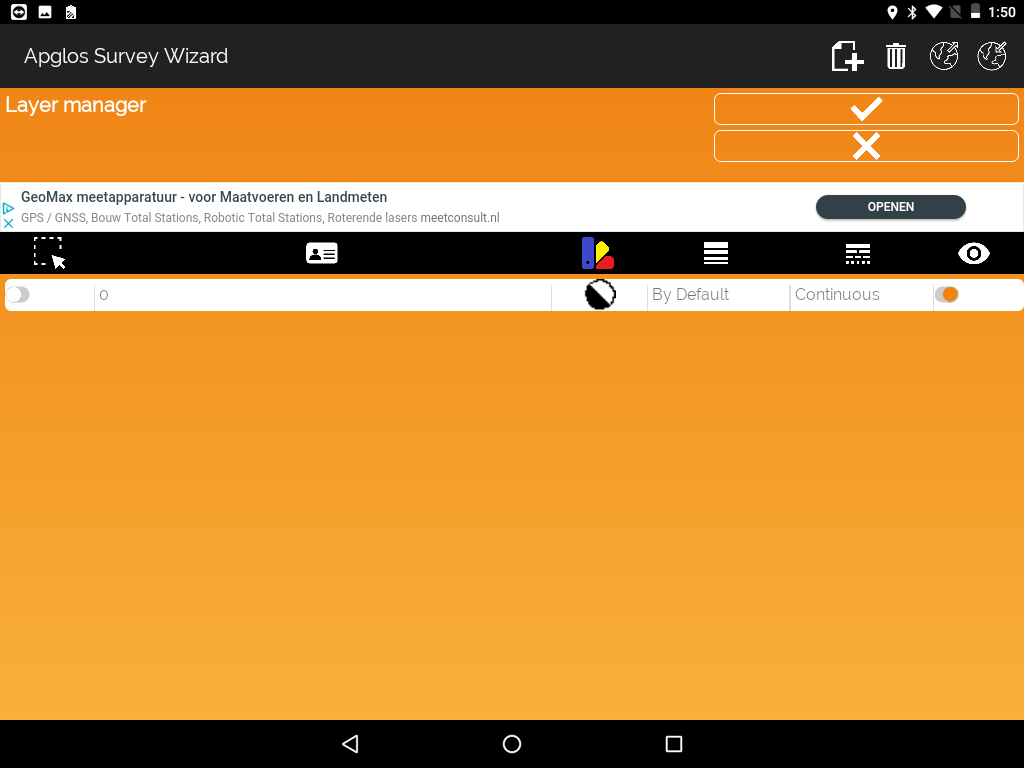
You can start a layer in the Layer manager screen by following the next steps:
1. From the Mapping screen, click on the ‘Layer’ button ![]() to be forwarded to the Layer manager screen.
to be forwarded to the Layer manager screen.
2. Now you are in the Layer manager.
3. Click ![]() to be forwarded to the Add layer screen:
to be forwarded to the Add layer screen:
4. Now you are in the Add layer screen:
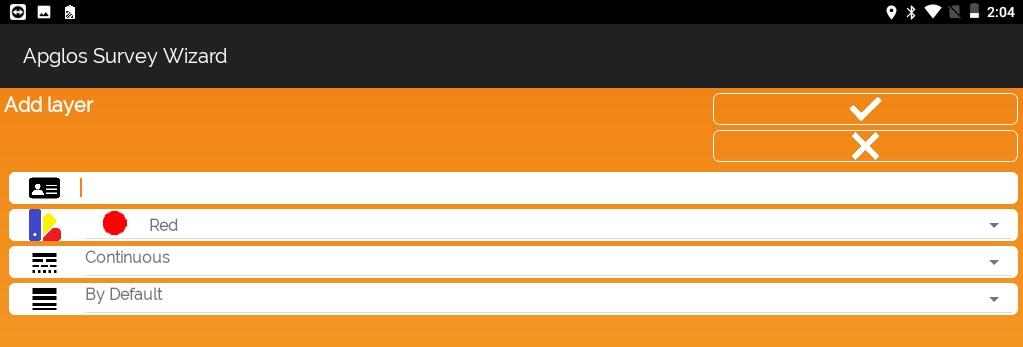
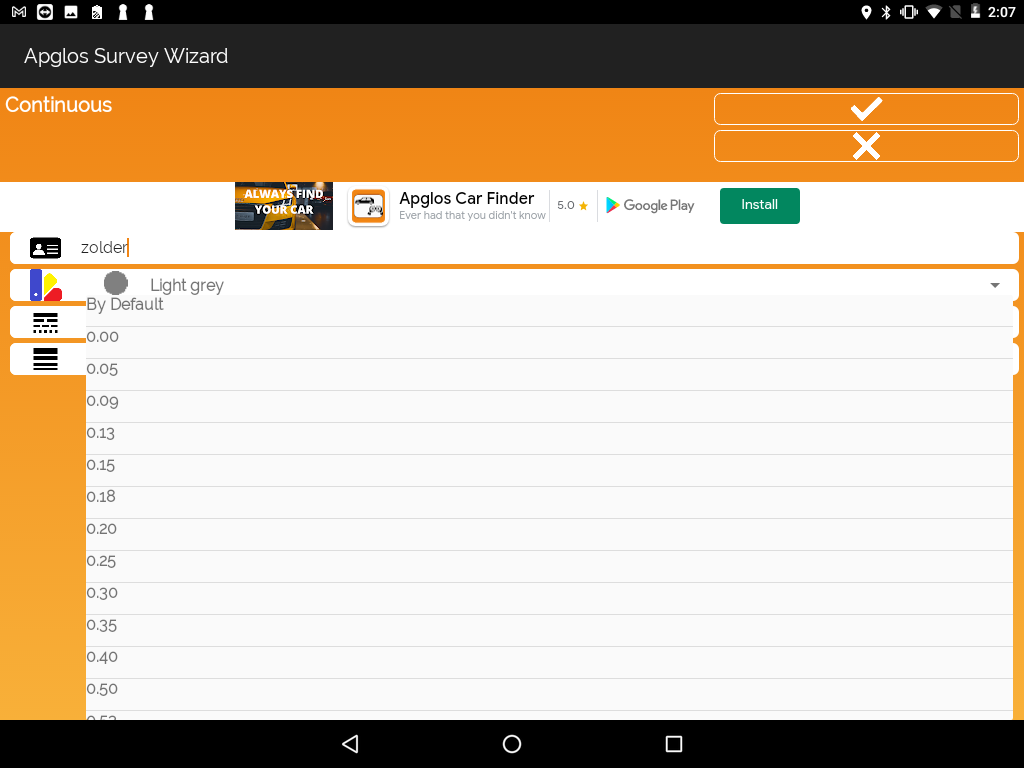
5. Fill out the menu starting by the top option:
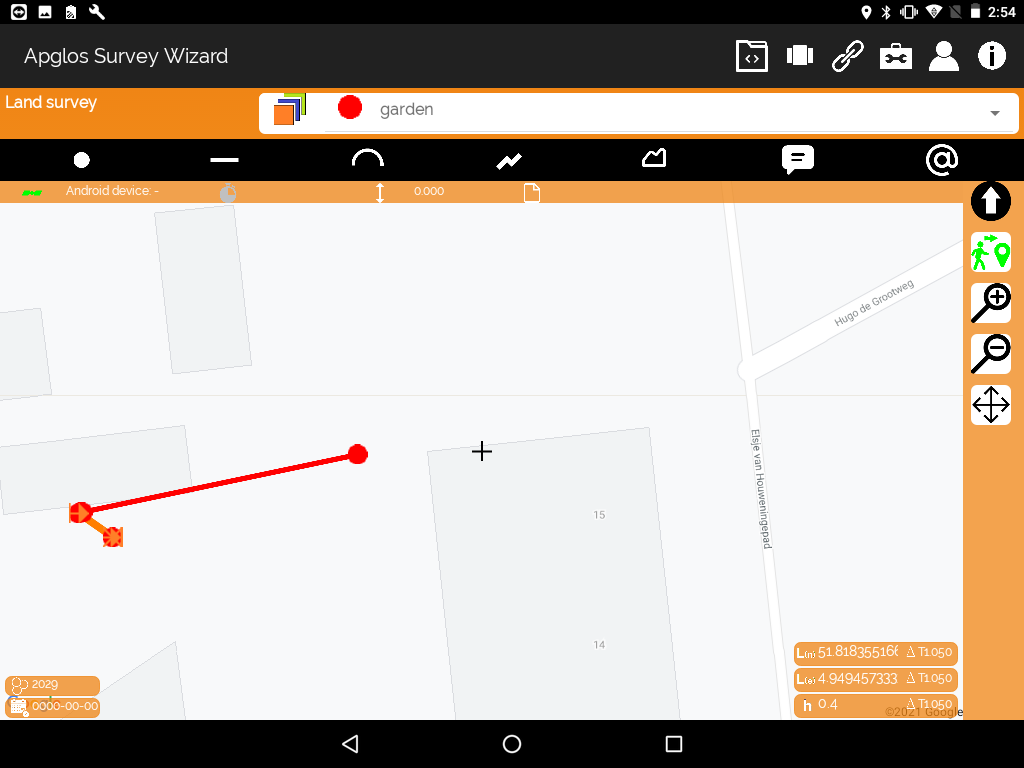
– Enter name of the layer
– Pick a color
– Pick a line type
– Pick a line weight
– Click the ‘V’ button to confirm
Before selecting a layer you need to add a layer. For adding a layer, click the topic above: How to add a layer. When you added a layer, you need to select the layer to work in the layer. You can select a layer in the Mapping screen through the following steps:
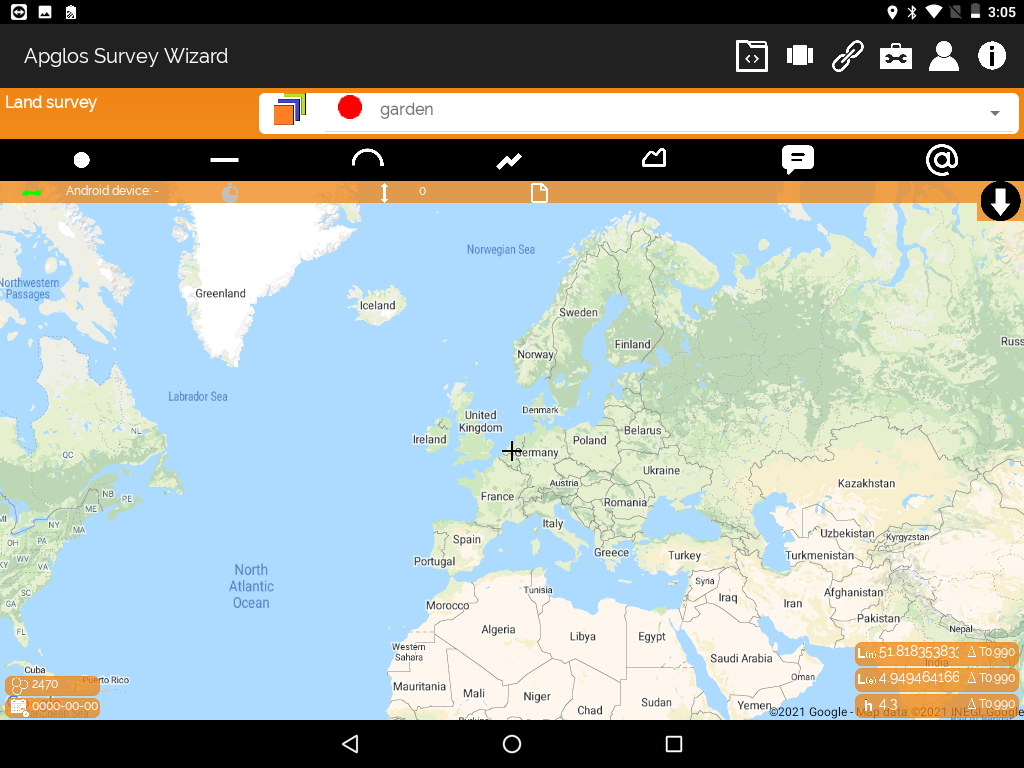
1. Click the Layer selector next to the Layer manager icon ![]() .
.
2. Now you can select the required layer.
3. Everything you map will now be saved in the selected layer.
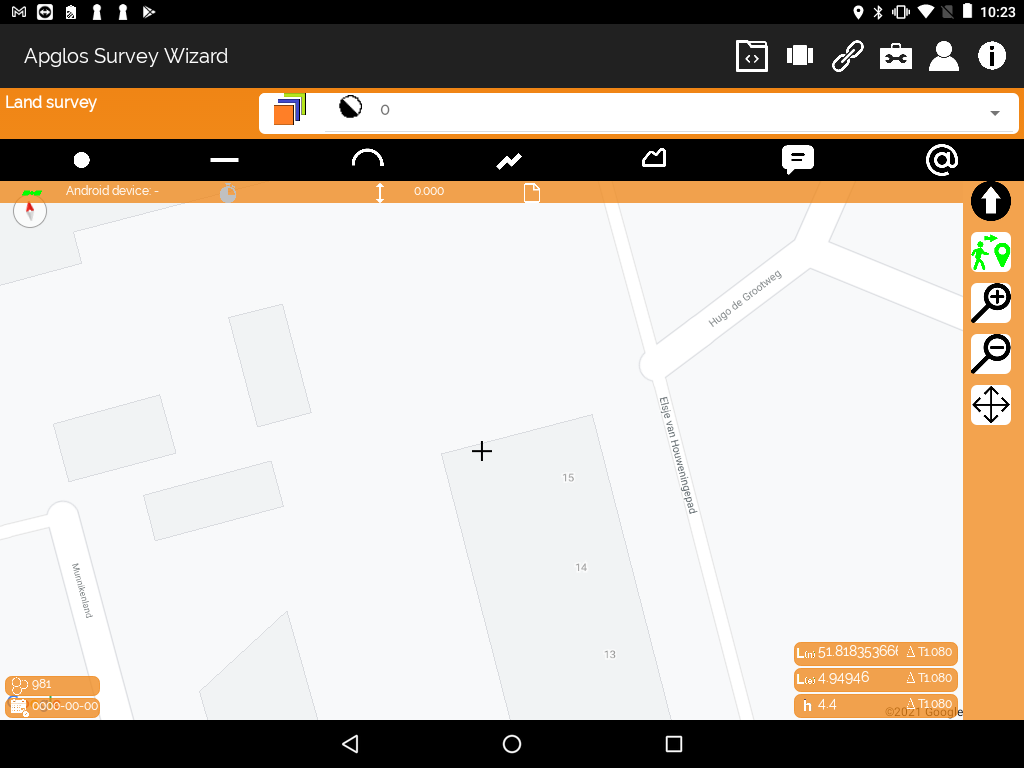
You can map a point in the mapping screen through following the next steps:

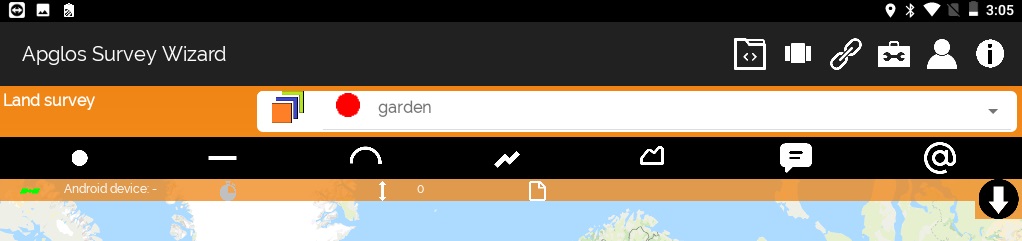
1. First step is to click the button ![]() on the right top of your screen and click the ‘Land survey’ button to be forwarded to the Mapping screen.
on the right top of your screen and click the ‘Land survey’ button to be forwarded to the Mapping screen.
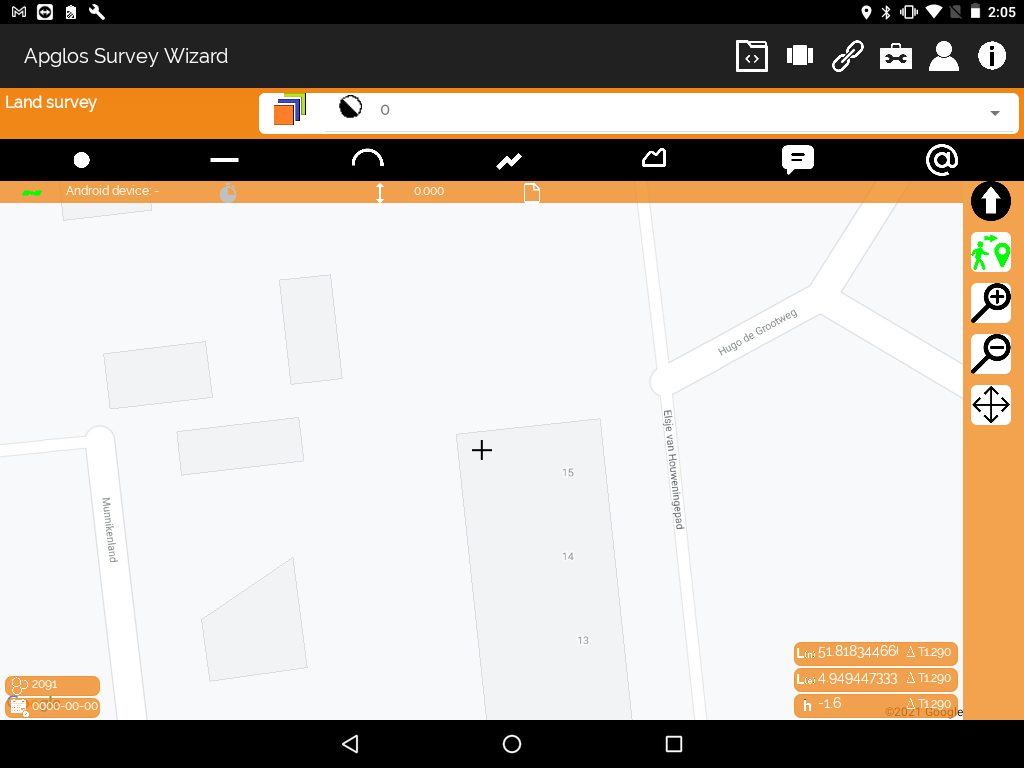
2. Next you have to check your satellite signals. In the left top of the screen you will notice a signal symbol ![]() . This symbol needs to be green to be able to start mapping.
. This symbol needs to be green to be able to start mapping.
3. When you only use an Android device, next to the satellite symbol it needs to say ‘Android device’.
4. When you use an external GNSS receiver it needs to say ‘RTK‘ as an indication for the correct connection.
5. The next step is to select a layer. For selecting a layer, check our topic above on How to select a layer.
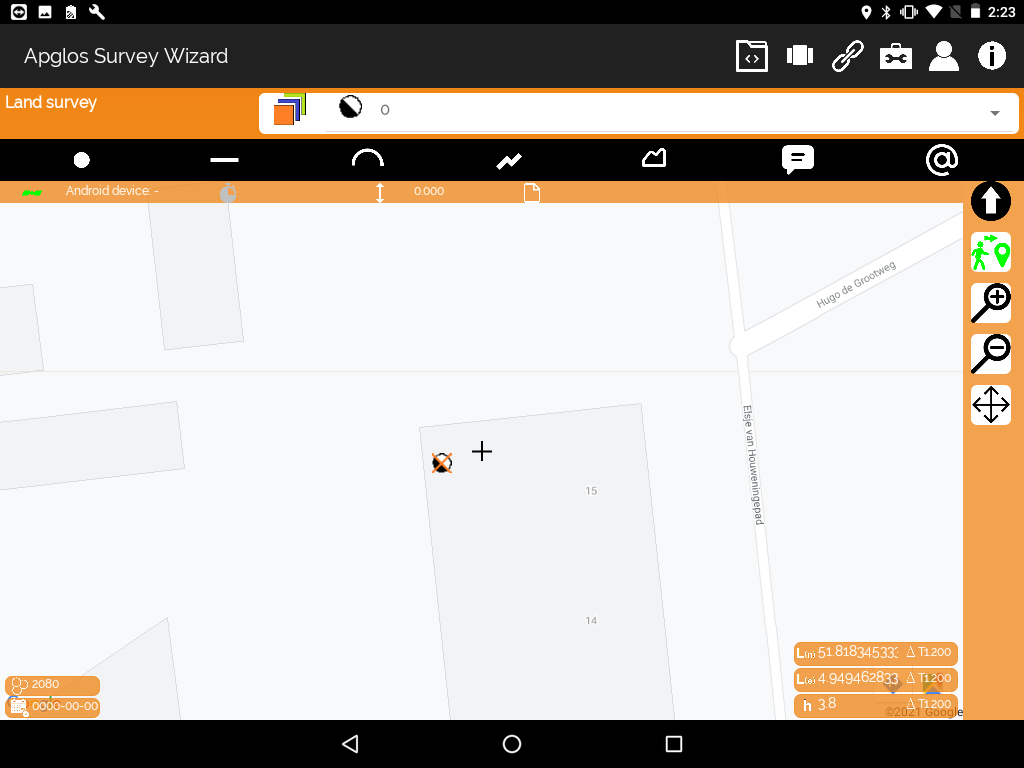
6. Now you can map a point by clicking the point button ![]()
7. The Mapping screen will show you the point. This point will be your current location.
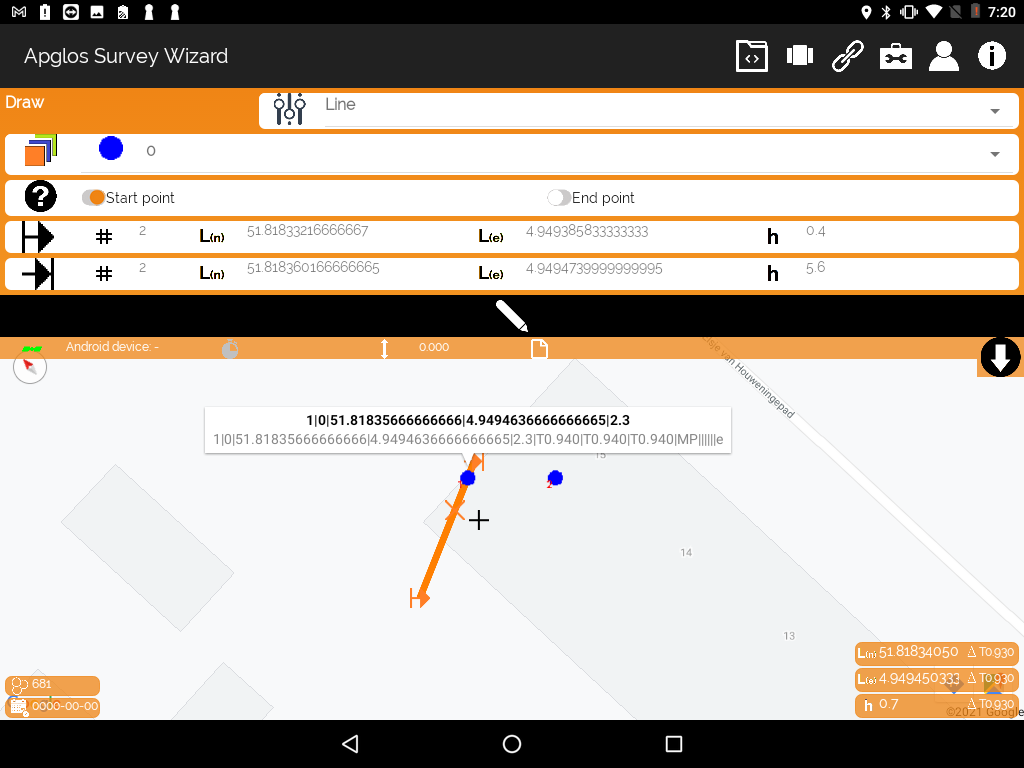
You can map a line in the Mapping screen by the next steps:

1. First step is to click the button ![]() on the right top of your screen and click the ‘Land survey’ button to be forwarded to the Mapping screen.
on the right top of your screen and click the ‘Land survey’ button to be forwarded to the Mapping screen.
2. Next step is to check your satellite signals. In the left top of the screen you will notice a signal symbol ![]() . This symbol needs to be green to start mapping.
. This symbol needs to be green to start mapping.
3. When you only use an Android device, be aware of the line next to the satellite symbol saying ‘Android device’.
4. When you use an external GNSS receiver it needs to say ‘RTK’ as an indication for using the correct connection.
5. Next step is to select a layer. For selecting a layer click on our topic above on How to select a layer.
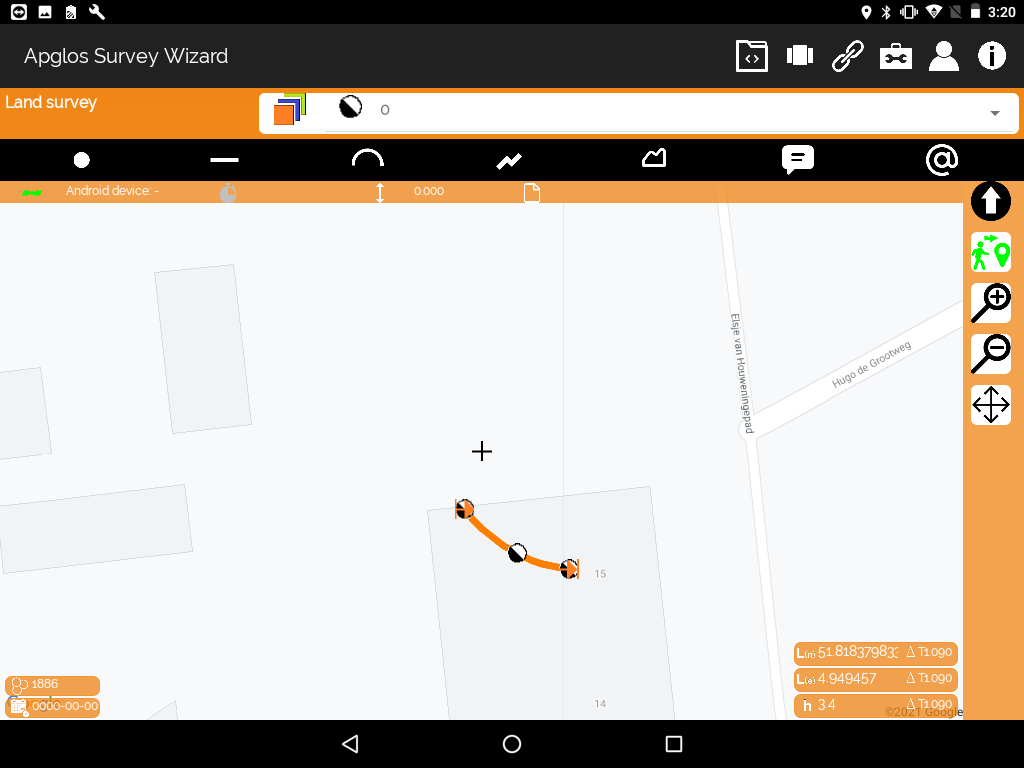
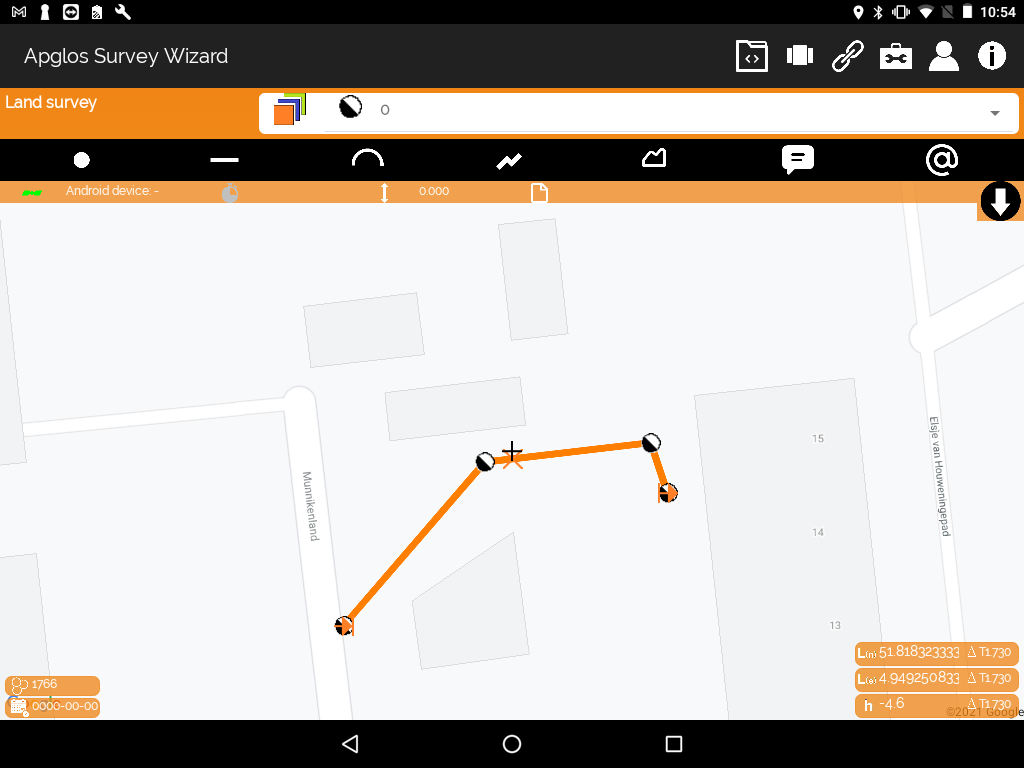
6. Now you can map the line. A line consists of two points, the startpoint and the endpoint.
There are two options for mapping a line:
Mapping a complete line
– Measure the start point by clicking the point button ![]()
– Move to the endpoint and click the line button ![]()
– Now you have mapped a line.
Mapping only the end point with a point which is already been mapped
– Click on the point which is already mapped. On top of the point a red cross appears.
– Position yourself at the endpoint of the line and click the line button ![]()
– Now you have mapped a line.
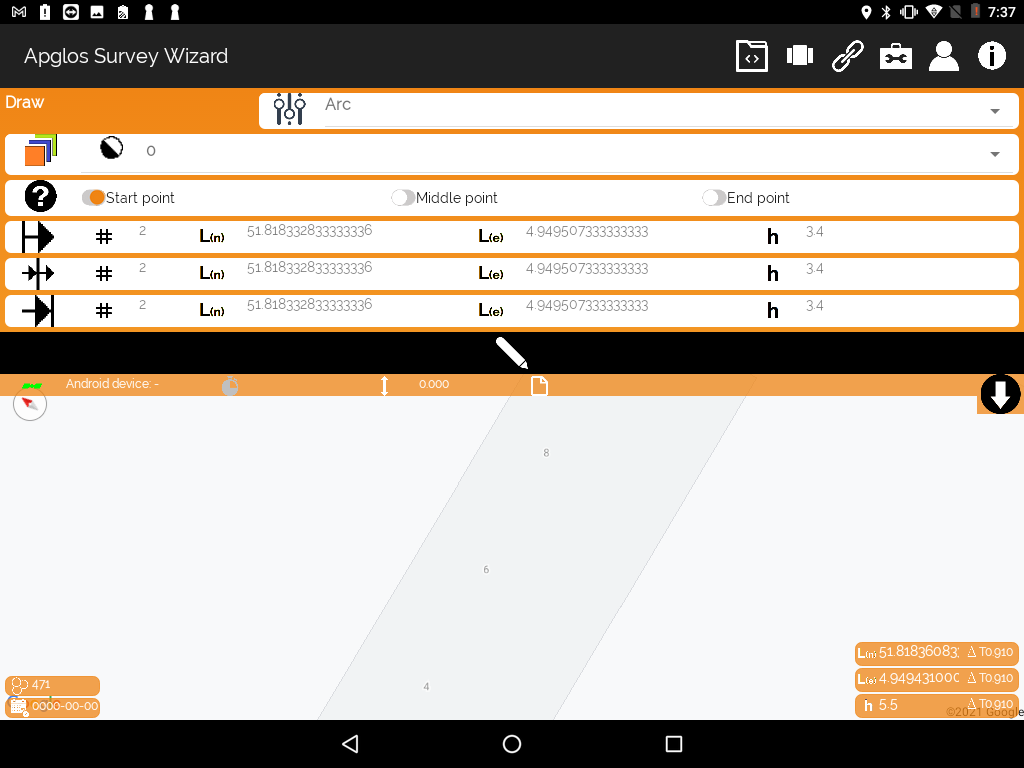
You can map an arc in the Mapping screen:
1. First step is to click the button ![]() on the right top of your screen and click the ‘Land survey’ button to be forwarded to the Mapping screen.
on the right top of your screen and click the ‘Land survey’ button to be forwarded to the Mapping screen.
There are two options for mapping an arc.
Map a new arc
– Position yourself at the startpoint of the arc object.
– Click ![]() to map a point. A point will appear on the mapping screen.
to map a point. A point will appear on the mapping screen.
– Move yourself to another position on the arc object and click the line button ![]() . A line will appear on your screen from your startpoint towards your current position.
. A line will appear on your screen from your startpoint towards your current position.
– Next is to position yourself at the endpoint of the arc object and click the ‘Arc’ button ![]()
Make an arc from an existing line
– Select a line in the Mapping screen. The line will turn orange and an orange arrow  will appear. This arrow shows which way the line and also the arc is headed.
– Position yourself at the endpoint of the arc and click the ‘Arc‘ button ![]()
– Your line now became an arc.
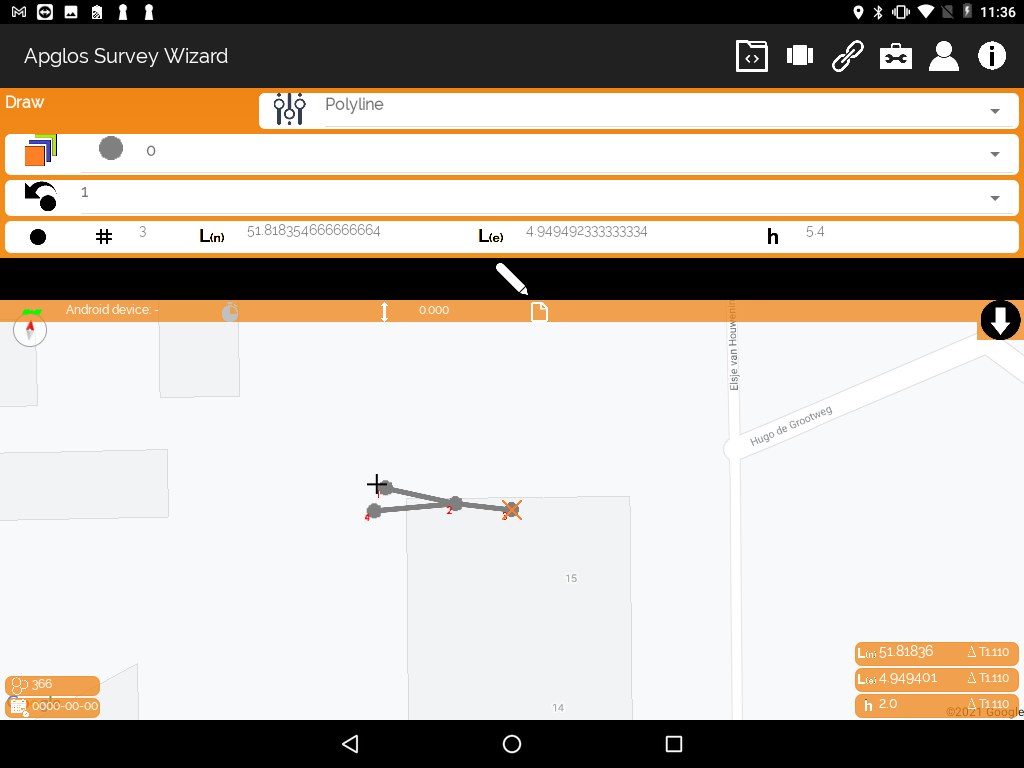
You can map a polyline in the Mapping screen:
1. First step is to click the button ![]() on the right top of your screen and click the ‘Land survey’ button to be forwarded to the Mapping screen.
on the right top of your screen and click the ‘Land survey’ button to be forwarded to the Mapping screen.
There are two options for mapping a polyline.
Map a new polyline
– Position yourself at the startpoint of the object.
– Click ![]() to map a point. A point will appear on the Mapping screen.
to map a point. A point will appear on the Mapping screen.
– Move yourself to a new position and click the ‘Polyline’ button ![]() . A line will appear on your screen from your start point towards your current position.
. A line will appear on your screen from your start point towards your current position.
– Repeat this until your polyline is completed.
Make a polyline from an existing point, line or polyline
– Select a point, line or polyline in the Mapping screen.
– Move yourself to a new position.
– Click the ‘Polyline‘ button ![]() to make a new polyline.
to make a new polyline.
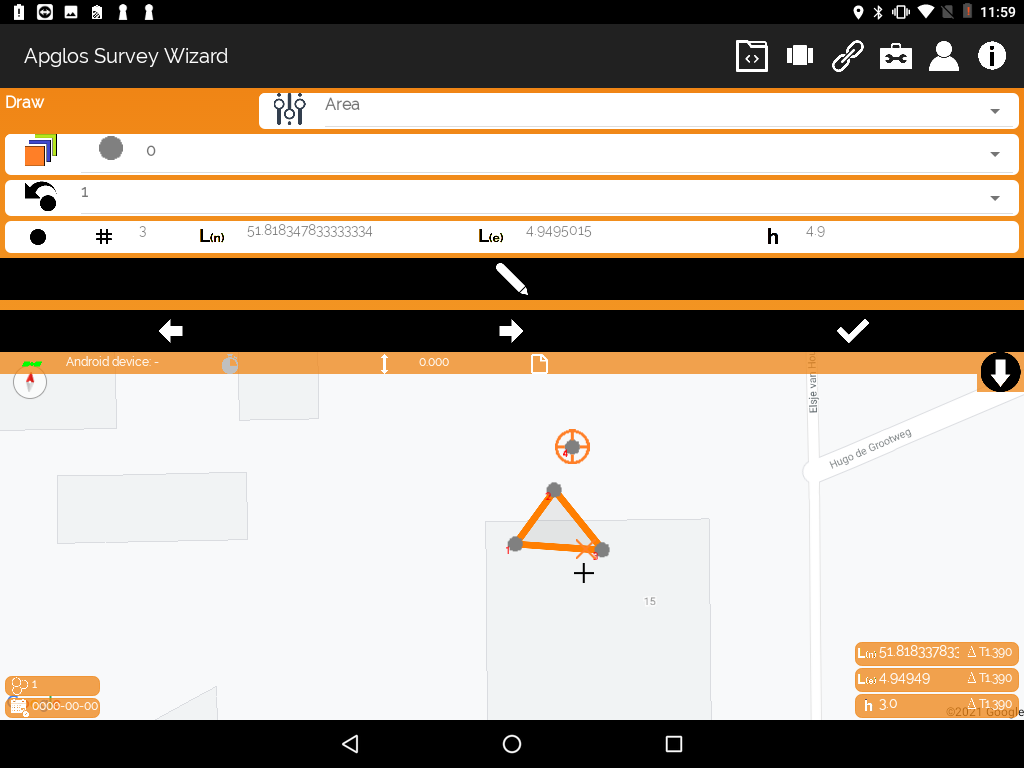
You can map a surface in the Mapping screen:

1. First step is to click the button ![]() on the right top of your screen and click the ‘Land survey’ button to be forwarded to the Mapping screen.
on the right top of your screen and click the ‘Land survey’ button to be forwarded to the Mapping screen.
There are two options for mapping a surface.
Map a new surface
– Position yourself at the startpoint of the object.
– Click ![]() to map a point. A point will appear on the mapping screen.
to map a point. A point will appear on the mapping screen.
– Move yourself to a new position and click the ‘Polyline’ button ![]() . A line will appear on your screen from your startpoint towards your current position.
. A line will appear on your screen from your startpoint towards your current position.
– Repeat this until the last point has been measured.
– Click the ‘Surface’ button ![]() and the surface is completed.
and the surface is completed.
Make a surface from an existing point, line or polyline
– Select a point, line or polyline in the Mapping screen.
– Move yourself to a new position.
– Click the ‘Surface’ button ![]() to make a new surface.
to make a new surface.
You can select a point in the Mapping screen by following the next steps:
1. You can select a point by clicking the point you want to select. An orange cross will appear when the point is selected.
2. When several points are standing close together, select one of the points. Now a bar with arrows will appear. Use the arrows to select the correct point.
3. When the right point is selected by the orange circle, click ‘V’ button to confirm.
You can select a line in the Mapping screen by the next steps:
1. Click the line you want to select. The line will turn orange when the line is selected.
When points are too close together to select a line, Apglos will tell you no line can be selected. Just click next to the line and the line will be selected and will turn orange.

There are two options to zoom in and out:
Option 1
– Zoom in by moving two fingers on the mapping screen and move them slowly apart over the screen
– Zoom out by moving two fingers on the mapping screen and move them slowly towards each other
Options 2
– Click on the arrow button on the right side of the mapping screen and the mapping tools will appear:
– Zoom in by clicking on ![]()
– Zoom out by clicking on ![]()
You can save your data as a DXF file in the File menu by following the next steps:
1. Click the ![]() icon and click ‘save’
icon and click ‘save’ ![]() in the menu. Now you are in the Saving screen.
in the menu. Now you are in the Saving screen.
2. Select DXF next to the icon ![]() for saving your data to a DXF file.
for saving your data to a DXF file.
3. Make sure the coordinate system is well set up. You can change the coordinate system in ‘other settings’.
4. Click next to ![]() and select the folder where the file is to be saved.
and select the folder where the file is to be saved.
5. Click next to the ![]() icon to enter the name of your file.
icon to enter the name of your file.
6. Check the box next to the plane to send the file directly.
7. Select the options for dimensions:
o Select 2D for a flat drawing with only heights marked in numbers in the file
o Select 3D if you want your file totally saved three dimensional
8. Select the units for the file.
9. Select the option for visible or invisible point numbers.
10. Select if deviations of the GNSS receiver may be marked visible or invisible in the file.
11. Click the V button to confirm and the file is saved now.
Note: You can’t change the coordinate reference system in the Saving screen. These changes can only be made in the Setting screen.
You can save your data as a TXT file in the File menu by following the next steps:
1. Click the ![]() icon and click ‘save’
icon and click ‘save’ ![]() in the menu.
in the menu.
2. Select TXT next to the icon ![]() for saving your data to a TXT file.
for saving your data to a TXT file.
3. Make sure the coordinate system is well set up. You can change the coordinate system in ‘other settings’.
4. Click next to the ![]() icon and select the folder where the file is to be saved.
icon and select the folder where the file is to be saved.
5. Click next to the icon to enter the name of your file.
6. Click next to ![]() icon and enter the name of the file.
icon and enter the name of the file.
7. Click the V button to confirm.
8. Check the box next to the plane to send the file directly.
9. Select which information needs to be saved in the file and in what order.
10. Next click the V button in the top right of the screen to confirm and the file is saved now.
You can save your data as a CSV file in the File menu by the next steps:
1. Click the ![]() icon and click ‘save’
icon and click ‘save’ ![]() in the menu.
in the menu.
2. Select CSV next to the icon ![]() for saving your data to a CSV file.
for saving your data to a CSV file.
3. Make sure the coordinate system is well set up. You can change the coordinate system in ‘other settings’.
4. Make sure the units are well set up. You can change the units in ‘other settings’.
5. Click next to ![]() and select the folder where the file is to be saved.
and select the folder where the file is to be saved.
6. Click next to the ![]() icon to enter the name of your file.
icon to enter the name of your file.
7. Check the box next to the plane to send the file directly.
8. Select which information needs to be saved in the file and in what order.
9. Next click the V button to confirm and the file is saved now.
You can open a DXF file in the File menu by following the next steps:
1. Click the ![]() icon and click ‘open’
icon and click ‘open’ ![]() in the menu.
in the menu.
2. Select ‘No’, by receiving warning to save current information, to be forwarded to open the DXF file.
3. Click next to the ![]() .
.
4. You will be forwarded to a screen where you can select your file.
5. Select the folder in which the needed file is located.
6. Click select on the bottom right of your screen.
7. You will be forwarded to the previous screen.
8. Select the required file next to ![]() icon Pay attention: Apglos Survey Wizard can only open the files in the folder that are accessible.
icon Pay attention: Apglos Survey Wizard can only open the files in the folder that are accessible.
9. Next click the V button on the top right of the screen to confirm.
10. Now you are forwarded to a new screen:
o Check the box to overwrite the block definitions.
o Check the box to overwrite the line type definitions.
o Check the box to overwrite the text style definitions.
11. Make sure the units and coordinate reference system is picked correctly.
12. Click the V button to confirm and you have opened the file now.
You can open a TXT file in the File menu by the next steps:
1. Click the ![]() icon and click open in the menu.
icon and click open in the menu.
2. Select ‘No’, by receiving warning to save current information, to be forwarded to open the TXT file.
3. Click next to the ![]() .
.
4. You will be forwarded to a screen where you can select your TXT file.
5. Select the folder in which the needed file is located.
6. Click select on the bottom right of your screen.
7. You will be forwarded to the previous screen.
8. Select the required file next to ![]() icon Pay attention: Apglos Survey Wizard can only open the files in the folder that are accessible.
icon Pay attention: Apglos Survey Wizard can only open the files in the folder that are accessible.
9. Click the V button to confirm.
10. Make sure the coordinate reference system is picked correctly.
11. Adjust the multiplier to meters if needed.
12. Choose the correct layout for the TXT file.
13. Click the V button to confirm.
14. You have opened the file now.
You can open a CSV file in the File menu by the following next steps:
1. Click the ![]() icon and click open in the menu.
icon and click open in the menu.
2. Select ‘No’, by receiving warning to save current information, to be forwarded to open the TXT file.
3. Click next to the ![]()
4. You will be forwarded to a screen where you can select your CSV file.
5. Select the folder in which the needed file is located.
6. Click select on the bottom right of your screen.
7. You will be forwarded to the previous screen.
8. Select the required file next to ![]() icon Pay attention: Apglos Survey Wizard can only open the files in the folder that are accessible.
icon Pay attention: Apglos Survey Wizard can only open the files in the folder that are accessible.
9. Click the V button to confirm.
10. Make sure the coordinate reference system is picked correctly.
11. Adjust the multiplier to meters if needed.
12. Choose the correct layout for the CSV file.
13. Click the V button to confirm.
14. You have opened the file now.
You can stake out a point in the Screen menu by following the next steps:
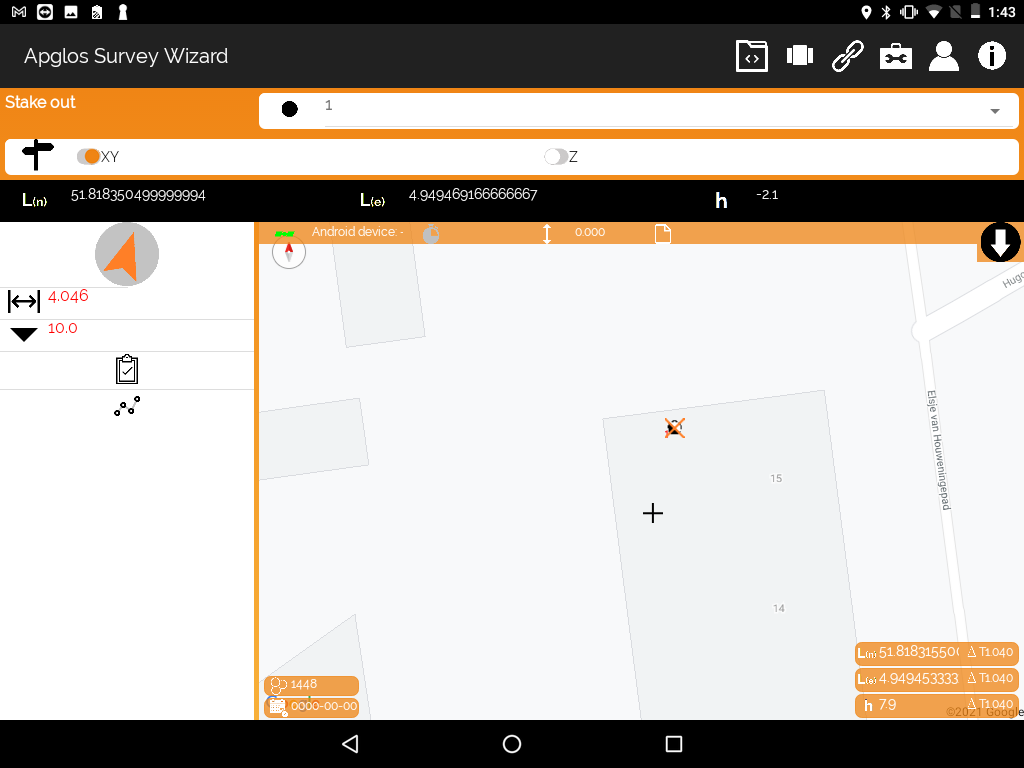
1.. Click the ‘stake out’ button in the Screen menu ![]()
2. Select the point you want to stake out.
3. Walk in the direction of the arrow until the horizontal distance is 0.00.
4. When your distance is 0.00 you can stake out the point.
You can stake out a line object in the Screen menu by following the next steps:
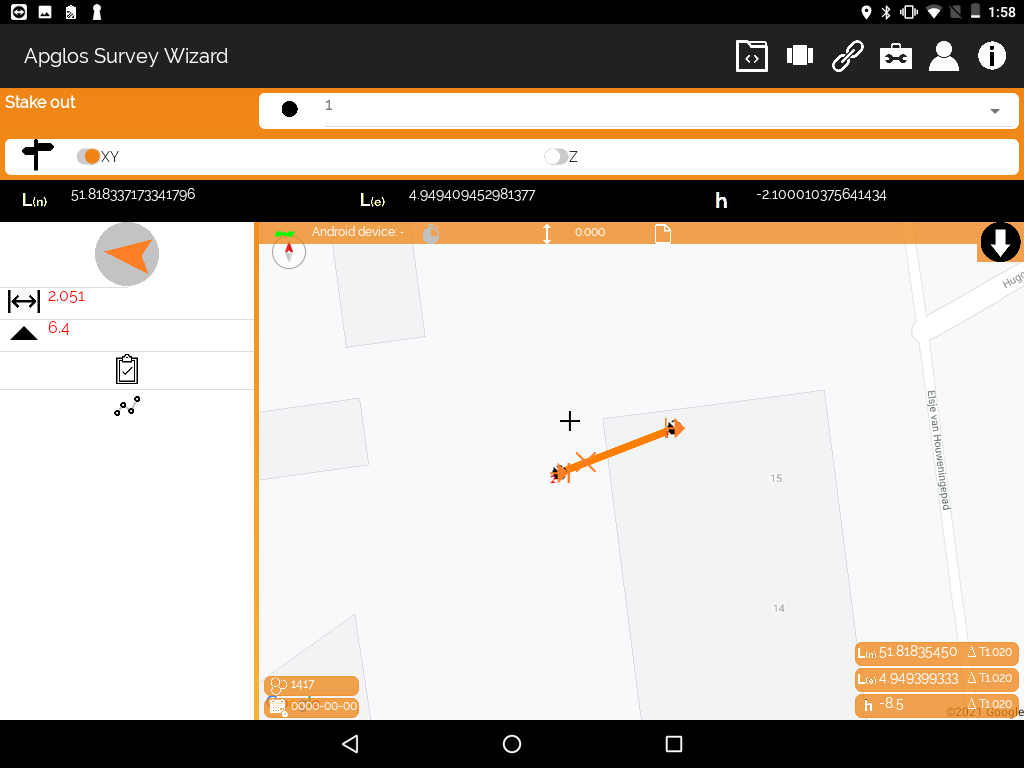
1. Click the ‘stake out’ button in the Screen menu ![]()
2. Select the line object you want to stake out.
3. Walk in the direction of the arrow until the horizontal distance is 0.00.
4. When your distance is 0.00 you can stake out the line object.
You can stake out a surface in the Screen menu by following the next steps:
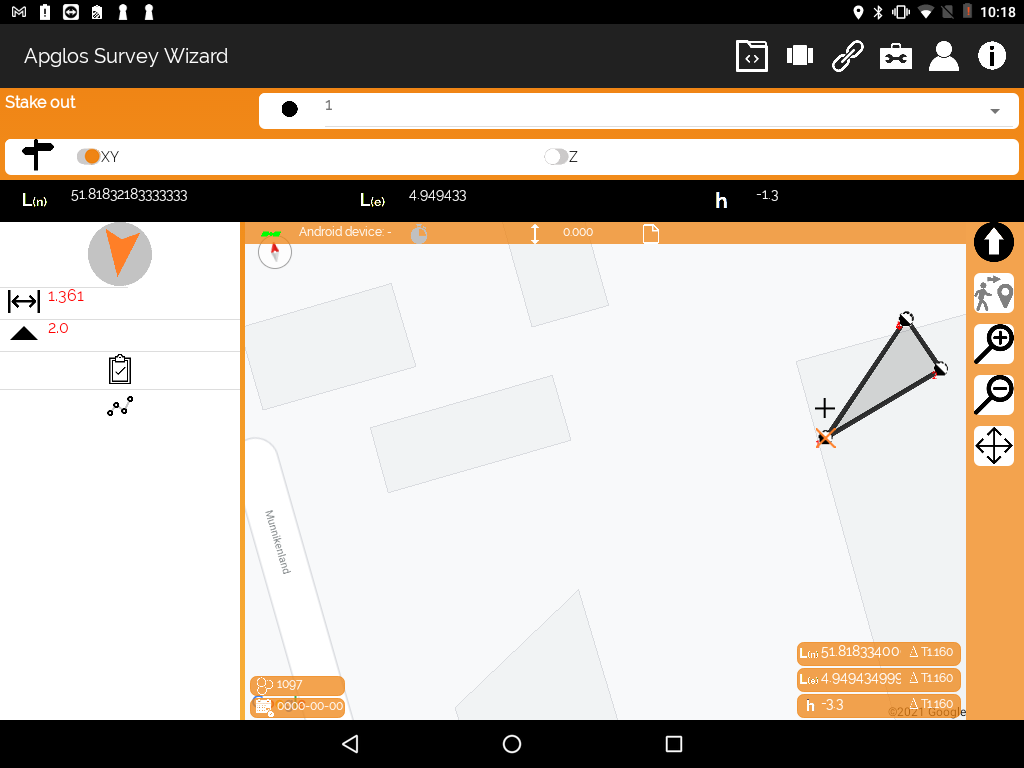
1. Click the ‘stake out’ button in the Screen menu ![]()
2. Select the surface you want to stake out.
3. When your position is outside the surface, walk in the direction of the arrow until the horizontal distance is 0.00.
4. When your position is in the surface, move the GPS receiver up and down until the vertical distance is 0.00.
5. When your distance is 0.00 you can stake out the surface.
You can remove an object by following the next steps:
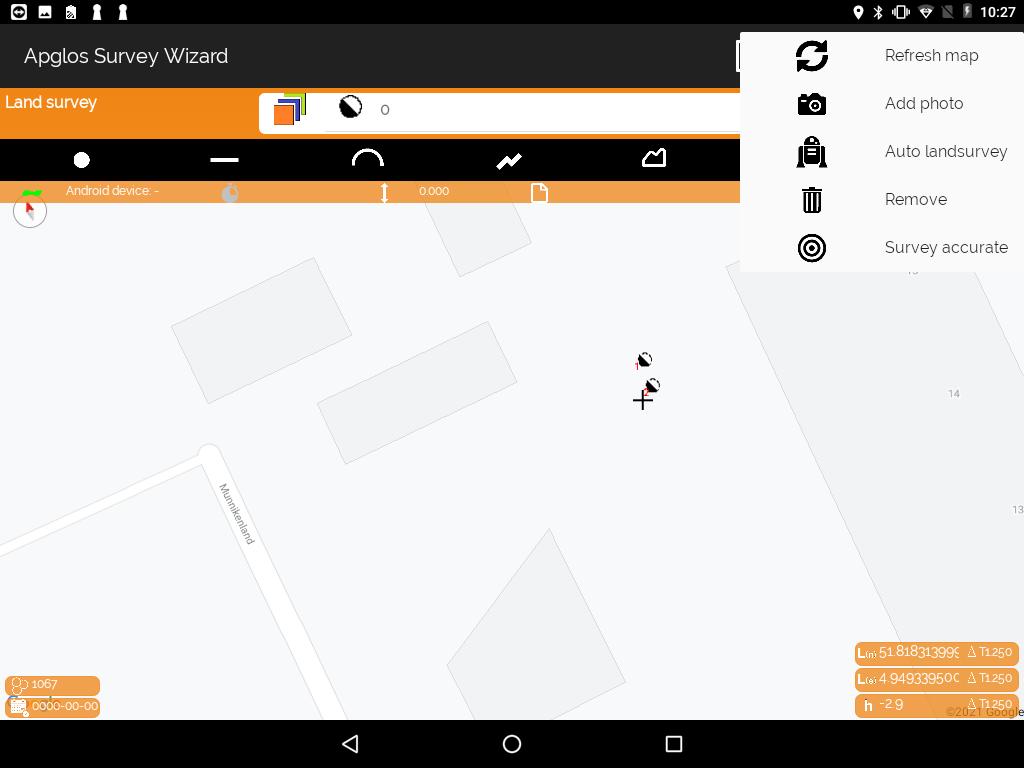
1. Select the object you want to remove.
2. Click the toolbox menu ![]() in the top right of your screen.
in the top right of your screen.
3. Click remove to remove the object.
You can add a comment in the Screen menu by following the next steps:
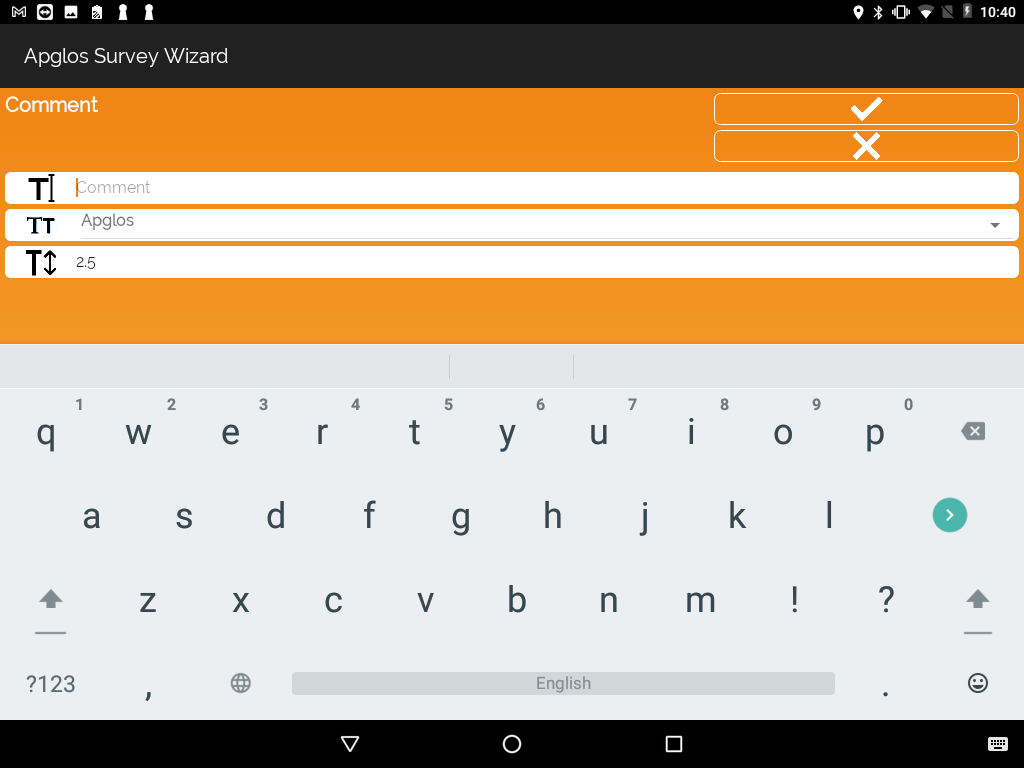
1. Click ‘land survey’ in the Screen menu ![]()
2. Click ![]() to be forwarded to the Comment screen.
to be forwarded to the Comment screen.
3. Fill in your comment.
4. Select the text style for a DXF output.
5. Select the text height for a DXF output.
6. Click the V button to confirm.
You can add a symbol in the Screen menu by following the next steps:
(Adding a symbol is only possible for DXF output)
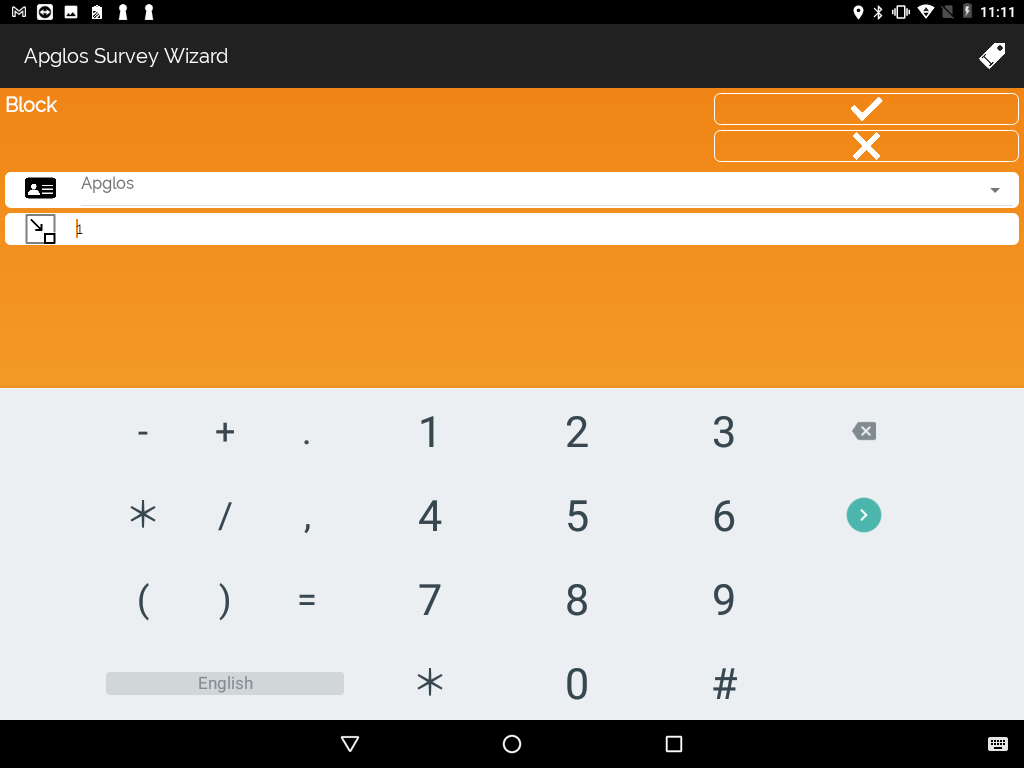
1. Click ‘land survey’ in the Screen menu ![]()
2. Click ![]() to be forwarded to the Block screen.
to be forwarded to the Block screen.
3. Select the required Symbol /Block.
4. Adjust the scale factor if needed.
5. Click the V button to confirm.
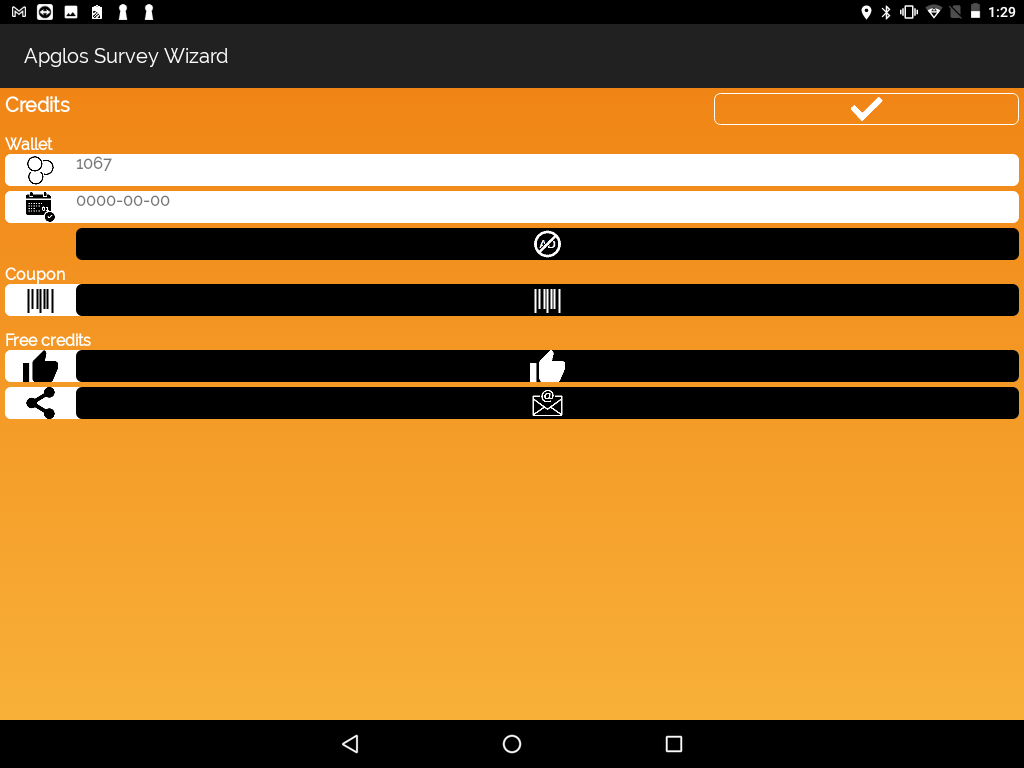
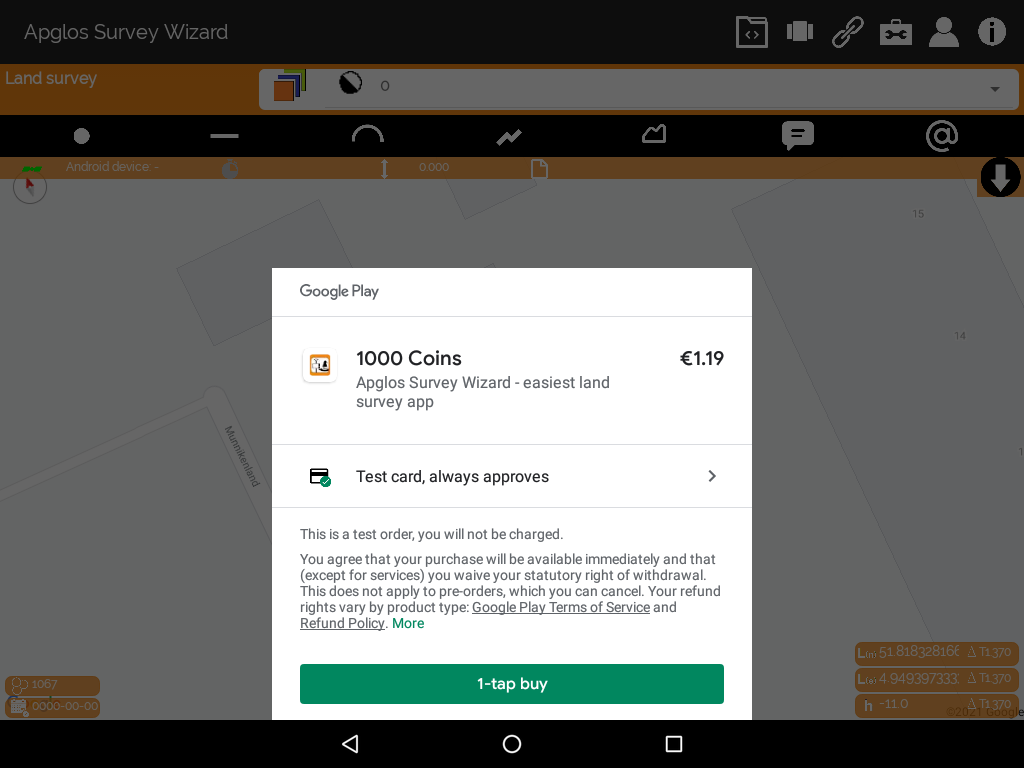
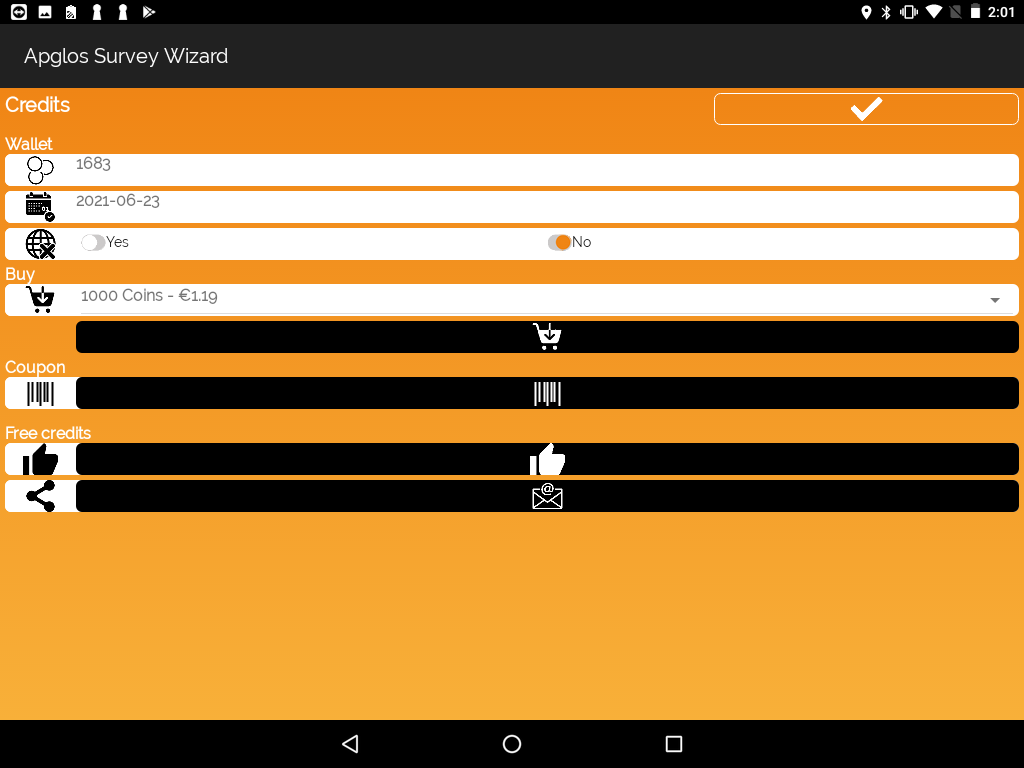
You can buy coins in the Profile menu by following the next steps:
(Make sure a payment arrangement has been installed on your Google-account!)
There are three options to buy coins:
First option:
1. Click the Profile menu ![]()
2. Click the option ‘Coins’ to be forwarded to the Credits screen
3. Select the desired amount of coins
4. Click the button ‘Buy’ ![]()
5. Select the desired payment method
6. Click the 1- tap buy button
7. Click the V button to confirm
Second option:
1. Click the Profile menu ![]()
2. Click the option: xxxx Coins – €
3. Select the desired payment method
4. Click the 1- tap buy button
Third option:
1. With a low amount of coins on your account, the question can pop up in your screen for buying more coins
2. Click ‘yes’ if you want to buy more coins
3. Select the desired payment method
4. Click the 1- tap buy button
You can use a coupon in the Profile menu by following the next steps:
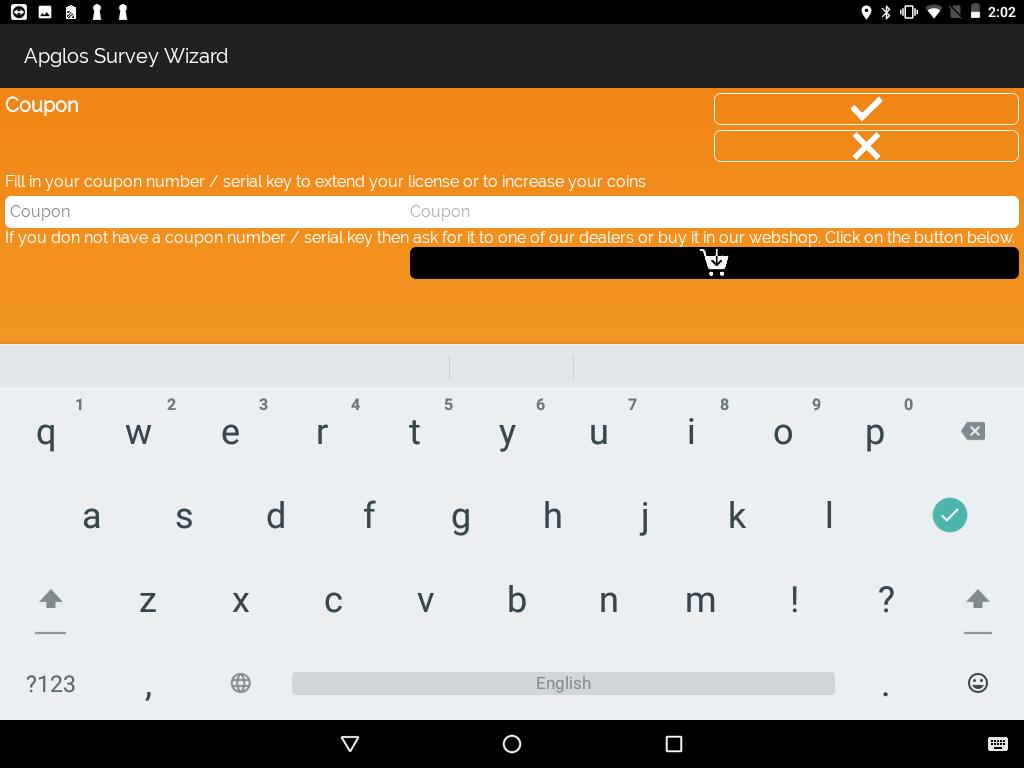
1. Click on the Profile menu ![]()
2. Click the option ‘Coins’ to be forwarded to the Credits screen.
3. Click the coupon button ![]() .
.
4. Enter the coupon number. (If you don’t have a coupon number, click the ![]() button and buy the coins in our webshop.)
button and buy the coins in our webshop.)
5. Click the V button to confirm.
You can get the XYZ – value of a point in the Screen menu by following the next steps:
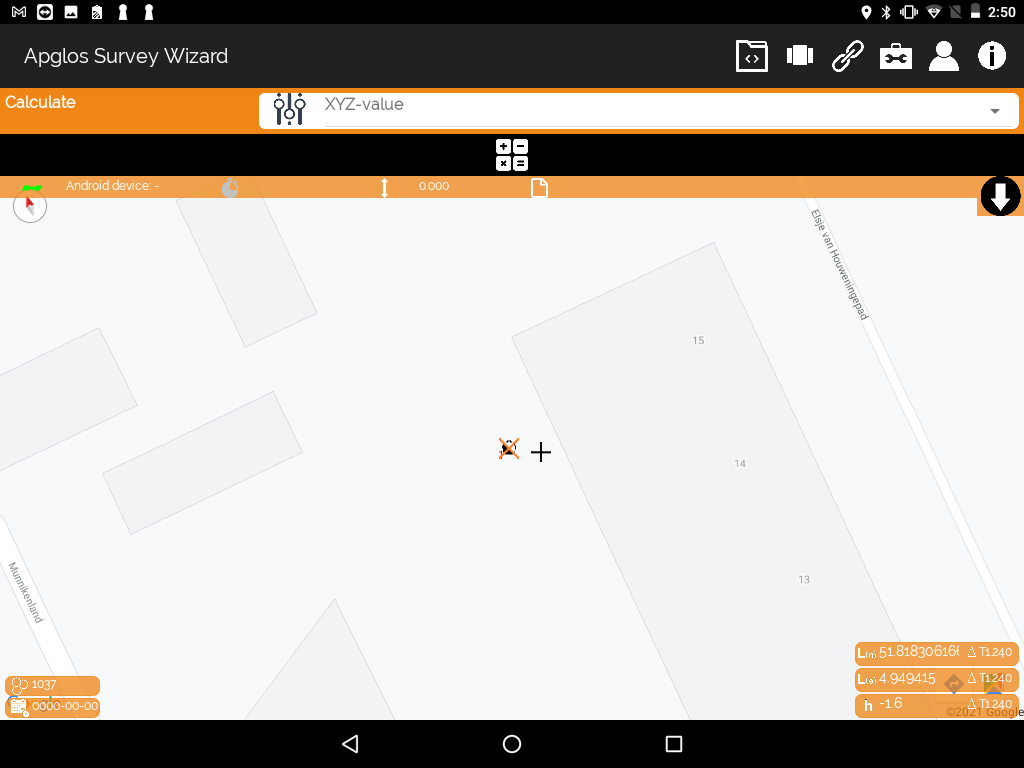
1. Make sure that a correct coordinate system is set.
2. Click on the Screen menu ![]() .
.
3. Click the ‘Calculate’ button in the Screen menu.
4. Select ‘XYZ – value’ next to the ![]() icon.
icon.
5. Click ![]() to calculate the XYZ – value of a point.
to calculate the XYZ – value of a point.
You can count the amount of objects in the Screen menu by following the next steps:
1. Click on the Screen menu ![]() .
.
2. Click the ‘Calculate’ button in the Screen menu.
3. Select ‘count’ next to the ![]() icon.
icon.
4. Click on the Layermanager ![]() to pick a layer for the object.
to pick a layer for the object.
5. Click next to the ![]() icon to add the object.
icon to add the object.
6. Click ![]() to calculate the amount of objects.
to calculate the amount of objects.
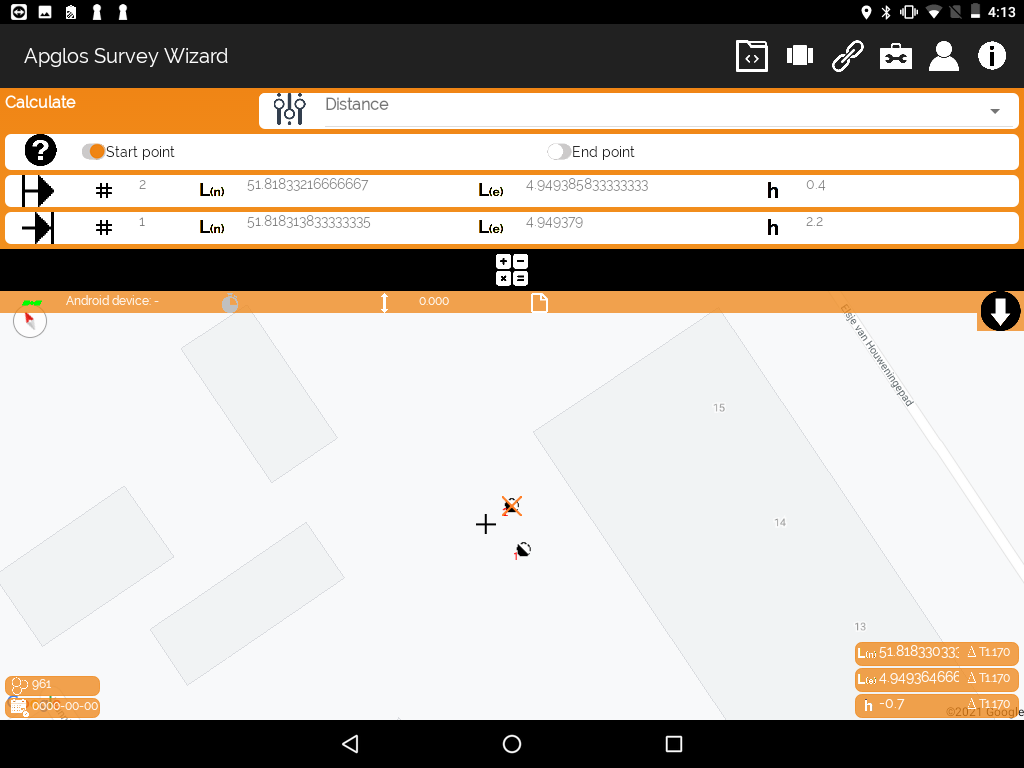
You can measure the distance between points in the Screen menu by following the next steps:
1. Click on the Screen menu ![]() .
.
2. Click the ‘Calculate’ button in the Screen menu.
3. Select ‘distance’ next to the ![]() icon.
icon.
4. Click on ‘start point’, the box will turn orange.
5. Select the starting point on the map.
6. Click the V button to confirm.
7. Click on ‘end point’, the box will turn orange.
8. Select the end point on the map.
9. Click the V button to confirm.
10. Click ![]() to calculate the distance between the points.
to calculate the distance between the points.
You can measure the height difference between points in the Screen menu by following the next steps:
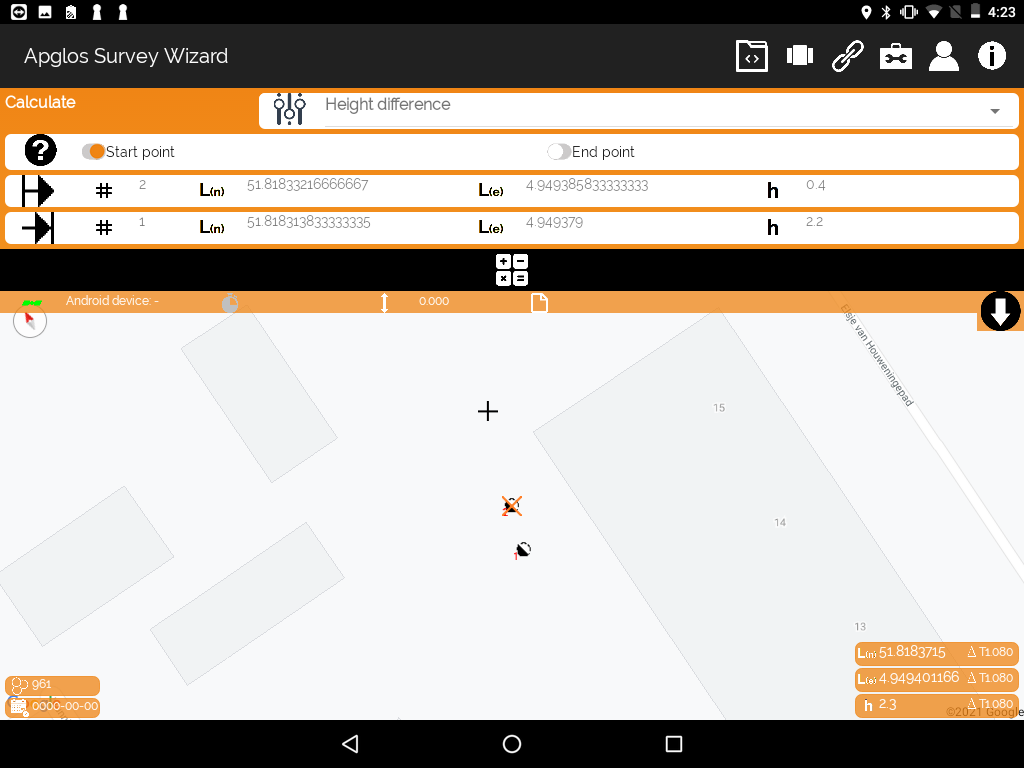
1. Click on the Screen menu ![]() .
.
2. Click the ‘Calculate’ button in the Screen menu.
3. Select ‘height difference’ next to the ![]() icon.
icon.
4. Click on ‘start point’, the box will turn orange.
5. Select the starting point on the map.
6. Click the V button to confirm.
7. Click on ‘end point’, the box will turn orange.
8. Select the end point on the map.
9. Click the V button to confirm.
10. Click ![]() to calculate the height difference between the points.
to calculate the height difference between the points.
You can measure the length of a line in the Screen menu by following the next steps:
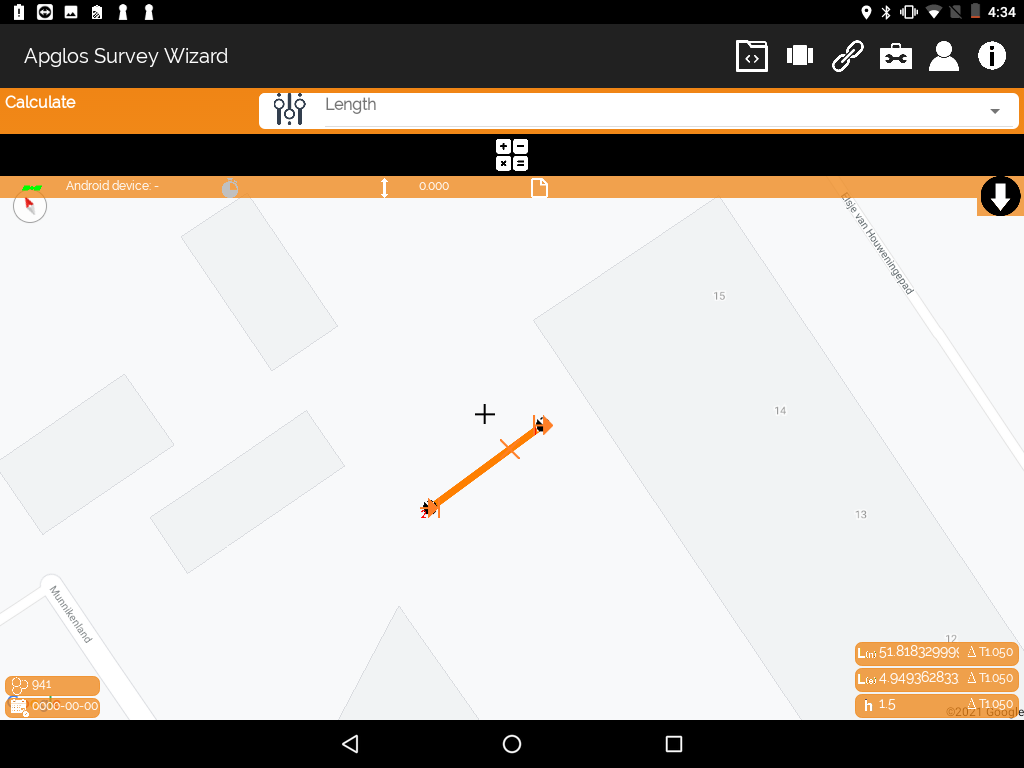
1. Click on the Screen menu ![]() .
.
2. Click the ‘Calculate’ button in the Screen menu.
3. Select ‘length’ next to the ![]() icon.
icon.
4. Select the line on the map.
5. Click ![]() to calculate the length of the line.
to calculate the length of the line.
You can measure the area of a surface in the Screen menu by following the next steps:
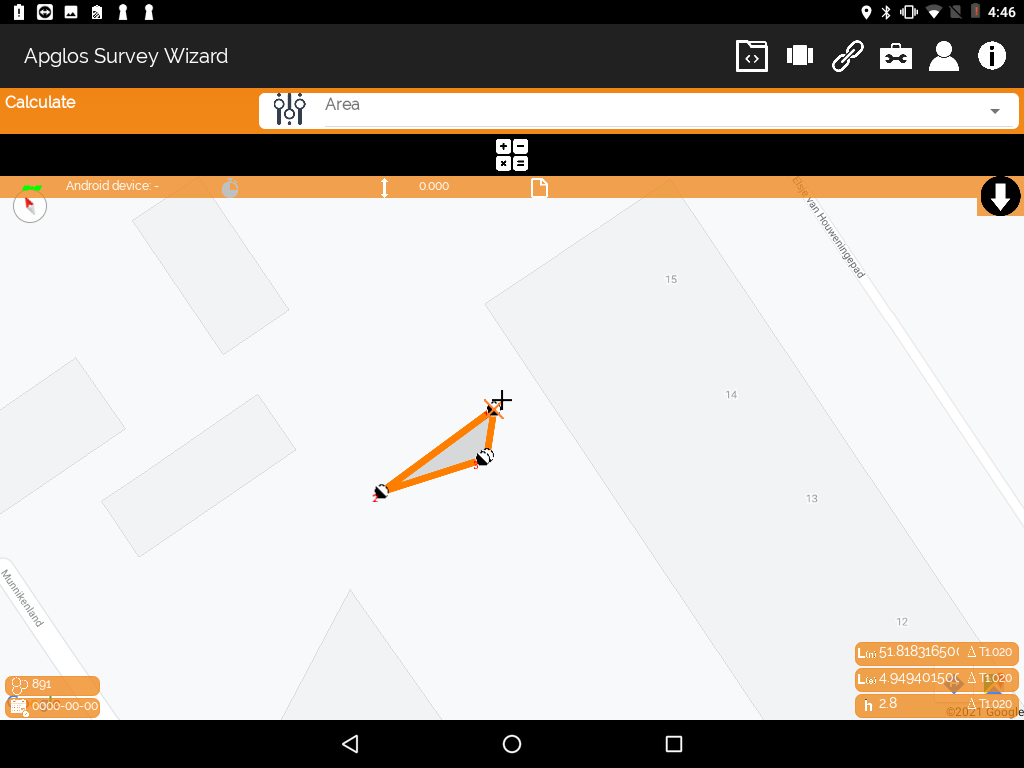
1. Click on the Screen menu ![]() .
.
2. Click the ‘Calculate’ button in the Screen menu.
3. Select ‘area’ next to the ![]() icon.
icon.
4. Select a surface on the map.
5. Click ![]() to calculate the area of the surface.
to calculate the area of the surface.
You can measure the volume of a surface in the Screen menu by following the next steps:
There are two options to measure the volume:
Option 1: Measure from a certain level
1. Click on the Screen menu ![]() .
.
2. Click the ‘Calculate’ button in the Screen menu.
3. Select ‘volume’ next to the ![]() icon.
icon.
4. Click on ‘from level’, the box will turn orange.
5. Click next to the ![]() icon.
icon.
6. Fill in the level.
7. Click the V button to confirm.
8. Select a surface in the map (containing the number of measures points).
9. Click ![]() to calculate the volume of the surface.
to calculate the volume of the surface.
Option 2: Measure from ground surface
1. Click on the Screen menu ![]() .
.
2. Click the ‘Calculate’ button in the Screen menu.
3. Select ‘volume’ next to the ![]() icon.
icon.
4. Click on ‘from ground surface’, the box will turn orange.
5. Select a surface in the map (containing the number of measure points).
6. Click ![]() to calculate the volume of the surface.
to calculate the volume of the surface.
You can enter a point manually in the Screen menu by following the next steps:
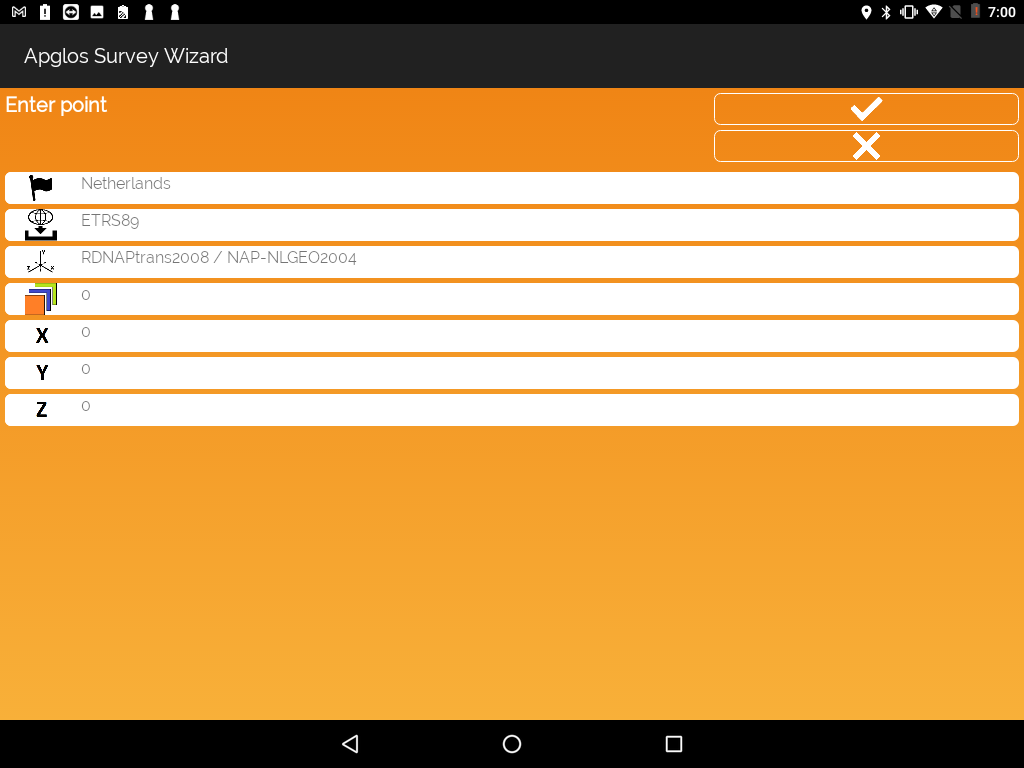
1. Make sure that a correct coordinate system is set.
2. Click on the Screen menu ![]() .
.
3. Click the ‘Draw’ button in the Screen menu.
4. Select the required layer for the point.
5. Select the option for manually entering the point.
6. Click the button to draw ![]() .
.
7. Click next to the X icon to enter the X – value.
8. Click the V-button to confirm.
9. Click next to the Y icon to enter the Y – value.
10. Click the V-button to confirm.
11. Click next to the Z icon to enter the Z – value.
12. Click the V-button to confirm.
You can draw a line in the Screen menu by following the next steps:
1. Click on the Screen menu ![]() .
.
2. Click the ‘Draw’ button in the Screen menu.
3. Select the required layer.
4. Select the option ‘line’.
5. Click on ‘start point’, the box will turn orange.
6. Select the required start point on the map.
7. Click on ‘end point’.
8. Select the required end point on the map.
9. Click the ‘draw’ button ![]() .
.
You can draw an arc in the Screen menu by following the next steps:
1. Click on the Screen menu ![]() .
.
2. Click the ‘draw’ button ![]() in the Screen menu.
in the Screen menu.
3. Select the required layer.
4. Select the option ‘arc’.
5. Click on ‘start point’, the box will turn orange.
6. Select the required start point on the map.
7. Click on ‘middle point’, the box will turn orange.
8. Select the required point on the arc between the start- en the end point.
9. Click on ‘end point’.
10. Select the required endpoint on the map.
11. Click the ‘draw’ button ![]() .
.
You can draw a polyline in the Screen menu by following these steps:
1. Click on the Screen menu ![]() .
.
2. Click the ‘draw’ button ![]() in the Screen menu.
in the Screen menu.
3. Select the required layer.
4. Select the option ‘polyline’.
5. Select the point you want to add to the polyline on the map.
6. Select the polyline/line you want to add the point to.
7. Select the point you want the new point to be attached to.
8. Click the ‘draw’ button ![]() .
.
You can draw an area in the Screen menu following the next steps:
1. Click on the Screen menu ![]() .
.
2. Click the ‘draw’ button ![]() in the Screen menu.
in the Screen menu.
3. Select the required layer.
4. Select the option ‘area’.
5. Select the point you want to add to the area on the map.
6. Select the polyline/area you want to add the point to.
7. Select the point you want the new point to be attached to.
8. Click the ‘draw’ button ![]() .
.
You can draw an area in the Screen menu by following the next steps:
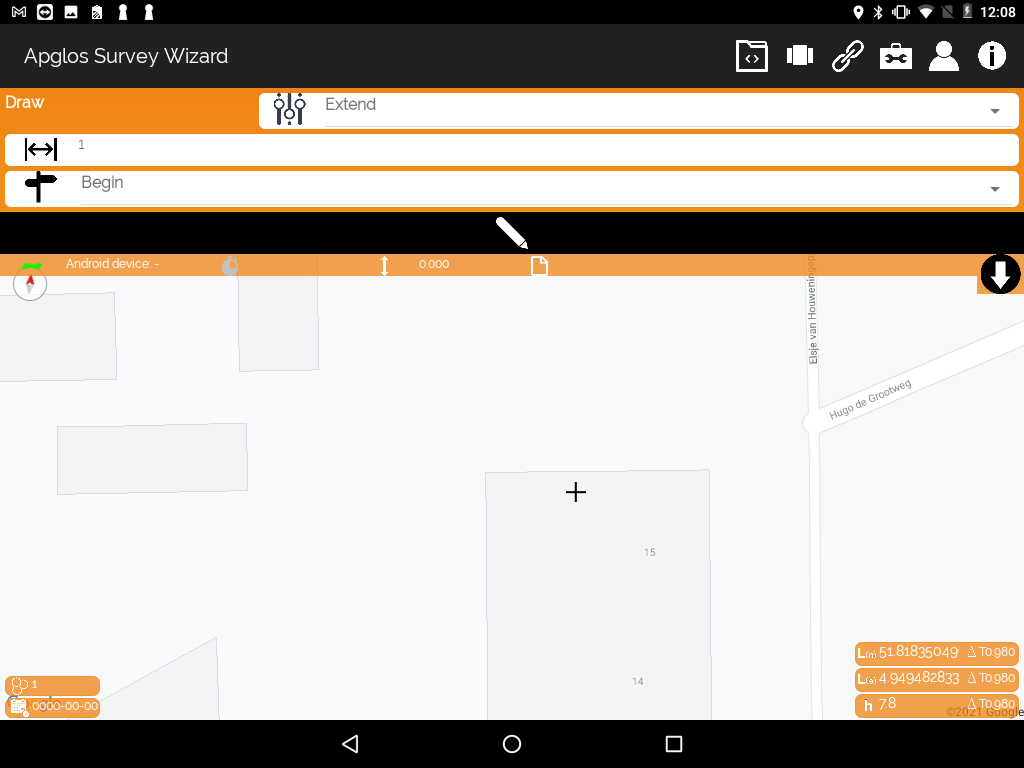
1. Click on the Screen menu ![]() .
.
2. Click the ‘draw’ button ![]() in the Screen menu.
in the Screen menu.
3. Select the option ‘extend’.
5. Select the line object you want to extend.
6. Click next to this icon ![]() .
.
6. Enter the required value by which to extend the line.
7. Indicate whether the line should be extended at the beginning or at the end.
8. Click the ‘draw’ button ![]() .
.
You can offset a line object or surface in the Screen menu by following the next steps:
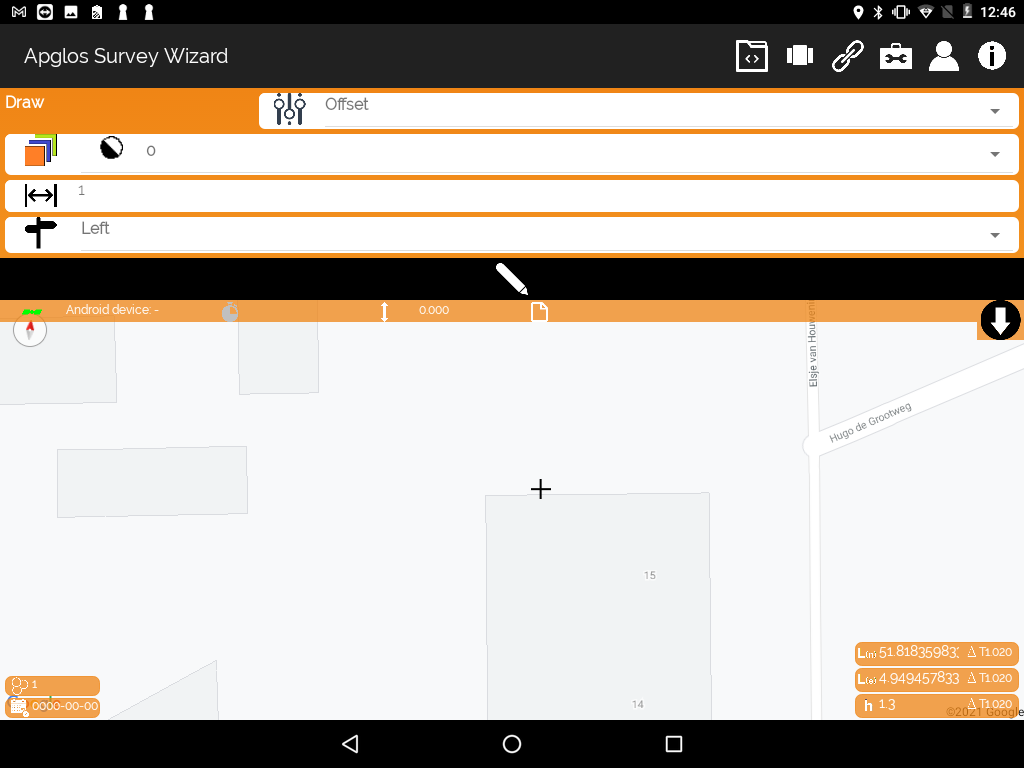
1. Click on the Screen menu ![]()
2. Click the ‘draw’ button ![]() in the Screen menu
in the Screen menu
3. Select the required layer
4. Select the option ‘offset’
5. Select the line object to be extended
6. Click next to this icon ![]()
7. Enter the required value by which the object should be drawn offset
8. Indicate whether the new object should be drawn at the left or at the right side
9. Click the ‘draw’ button ![]()
You can delete layers in the Screen menu by following the next steps.
You can only delete layers if you they contain no objects.
1. Click on ‘Land survey’ in the Screen menu ![]()
2. Click the layer manager button ![]()
3. Select the layer you want to delete
4. Click the ![]() icon in the top right of the screen to delete the layer
icon in the top right of the screen to delete the layer
You can export layers in the Screen menu through the next steps:
1. Click on ‘Land survey’ in the Screen menu ![]()
2. Click the layer manager button ![]()
3. Select the layers you want to export
4. Click the ![]() icon
icon
5. Click next to the ![]() icon en select the folder where the layers file should be saved
icon en select the folder where the layers file should be saved
6. Click the ‘select’ button
7. Enter the filename next to the ![]() icon
icon
8. Click the V-button to confirm
You can import layers in the Screen menu by going through the next steps:
1. Click on ‘Land survey’ in the Screen menu ![]()
2. Click the layer manager button ![]()
3. Select the layers you want to import
4. Click the ![]() icon
icon
5. Click on the layer file to be imported (.lyl)
6. Click the V-button to confirm
You can adjust a layer in the Screen menu by following the next steps:
1. Click on ‘Land survey’
2. Click the layer manager button ![]()
3. Select the name of the layer you want to adjust
4. Adjust the color as needed
5. Adjust the line type as needed
6. Adjust the line weight as needed
7. Click the V-button to confirm
You can adjust the display of coordinates in the File menu by following the next steps:
1. Click the ![]() icon and click other settings
icon and click other settings ![]() in the File menu
in the File menu
2. Click the layer manager button ![]()
3. Select the coordinate display as needed ( X/Y/Z, N / E / Z, lat / lon / alt )
4. Click the V-button to confirm
You can adjust the display of map in the File menu by following the next steps:
1. Click the ![]() icon and click other settings
icon and click other settings ![]() in the File menu
in the File menu
2. Click the layer manager button ![]()
3. Select the map display as needed (None / Map / Dark map / Satellite )
4. Click the V-button to confirm
You can turn on/off the help-video’s in the File menu by following the next steps:
1. Click the ![]() icon and click other settings
icon and click other settings ![]() in the File menu
in the File menu
2. Click ‘off’’ in the top bottom of the screen to turn off the help-video’s (the box will turn orange)
3. Click ‘on’ in the bottom of the screen to turn on the help-video’s (the box will turn orange)
4. Click the V-button to confirm
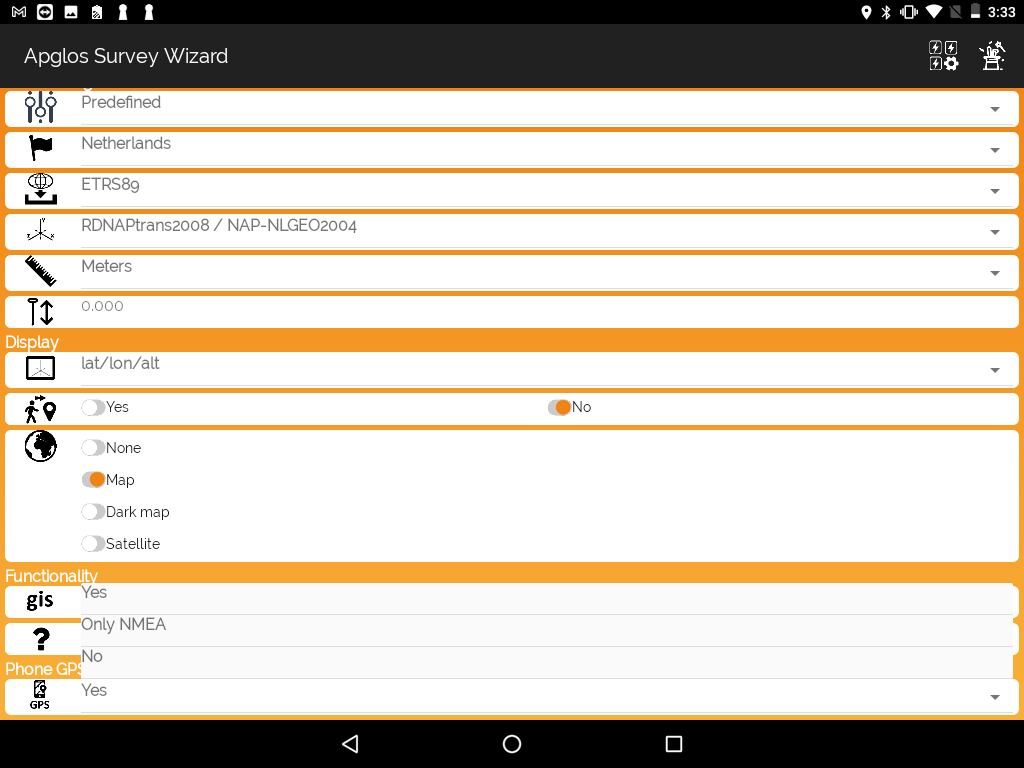
You can set the usability of the phone GPS in the File menu through the next steps:
1. Click the ![]() icon and click other settings
icon and click other settings ![]() in the File menu
in the File menu
2. Click next to the GPS icon to enter the required usability of the phone -> Only NMEA > Only NMEA data are used. (This is good when the GPS position of the device is overwritten by another device) o No > unusable o Yes > usable
3. Click the V-button to confirm
You can indicate whether you want to be followed by the app. There are two options to indicate:
Option 1 (File menu)
– Click the ![]() icon and click other settings
icon and click other settings ![]() in the File menu
in the File menu
– Click ‘yes’ next to the ![]() icon to be followed (the box will turn orange)
icon to be followed (the box will turn orange)
– Click ‘no’ next to the ![]() icon to be unfollowed (the box wil turn orange)
icon to be unfollowed (the box wil turn orange)
– Click the V-button to confirm
Option 2 (Mapping screen)
– Click the arrow on the right top of the map to expend the map functions
– Click the ![]() icon to be followed (the icon will turn green)
icon to be followed (the icon will turn green)
– Click the ![]() icon to be unfollowed (the icon will turn gray)
icon to be unfollowed (the icon will turn gray)
You can zoom to all mapped objects in the Mapping screen by the next steps:
1. Click the arrow on the top right of the map to expend the map functions
2. Click the icon ![]() with the 4 arrows to all directions
with the 4 arrows to all directions
You can add a photo to an object by following the next steps:
1. Select an object
2. Click the toolbox menu ![]() in the top right of your screen
in the top right of your screen
3. Click ‘Add photo’ in the menu
4. Click the photo button in the top right of the screen:
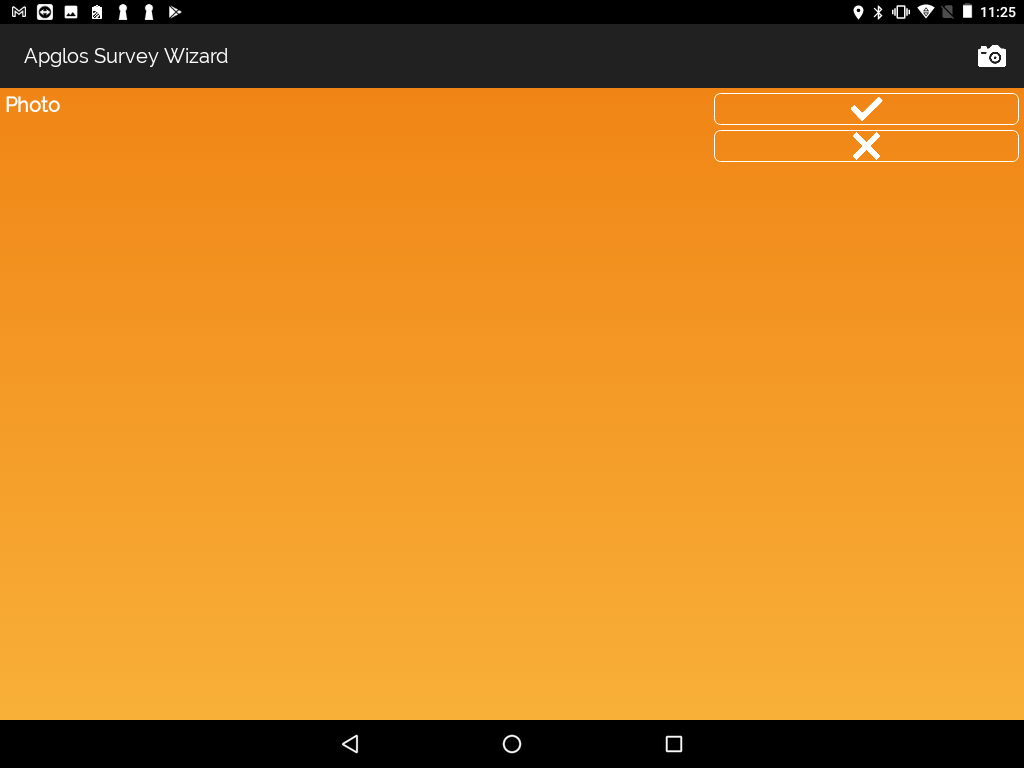
5. Click the V-button to confirm
You can automatically land survey in the Toolbox menu by following the next steps:

There are two options to land survey automatically:
Option 1 (with points)
– Click the toolbox menu ![]() in the top right of your screen
in the top right of your screen
– Click ‘Auto land survey’ in the menu
– Click ‘Point’ (the box will turn orange)
– Select whether you want to measure meters or seconds
– Enter the value to measure how many meters or seconds to measure
– Click the V-button to confirm
Option 2 (with a trace)
– Click the Toolbox menu ![]() in the top right of your screen
in the top right of your screen
– Click ‘Auto land survey’ in the menu
– Click ‘Polyline’ (the box will turn orange)
– Select whether you want to measure meters or seconds
– Fill in the maximum angle, used to determine if it is a straight line or a corner point
– Click the V-button to confirm
You can land survey accurate in the Toolbox menu by following the next steps:
1. Click the Toolbox menu ![]() in the top right of your screen 2. Click ‘Survey accurate’ in the menu
in the top right of your screen 2. Click ‘Survey accurate’ in the menu
3. Click one of the buttons (point, line, polyline, surface, comment or symbol) to start the accurate surveying
4. Hold the receiver still for 20 seconds
You can change your password in the Profile menu by following the next steps:
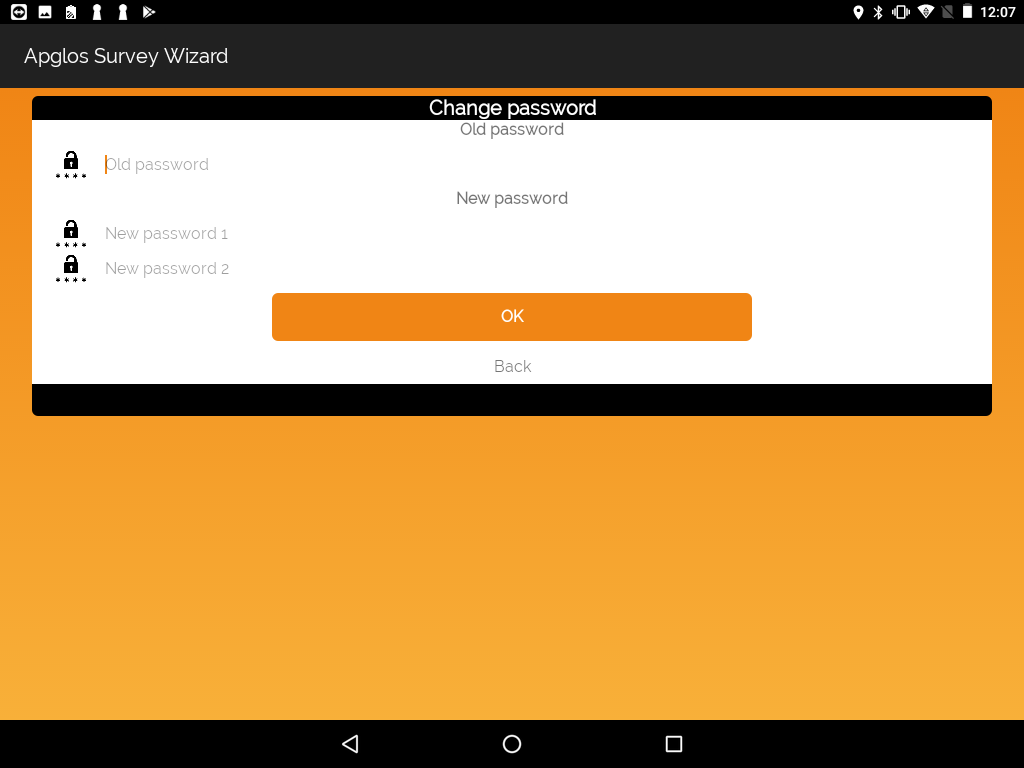
1. Click the Profile menu ![]() in the top right of your screen
in the top right of your screen
2. Click ‘Change password’ in the menu
3. Enter your current password
4. Enter your new password
5. Enter your new password again
6. Click the V-button to confirm
You can log off in the Profile menu by the next steps:

1. Click the Profile menu ![]() in the top right of your screen
in the top right of your screen
2. Click ‘Log off’ in the menu
3. Now you are logged out
You can get to the manual through the Information menu by following the next steps:
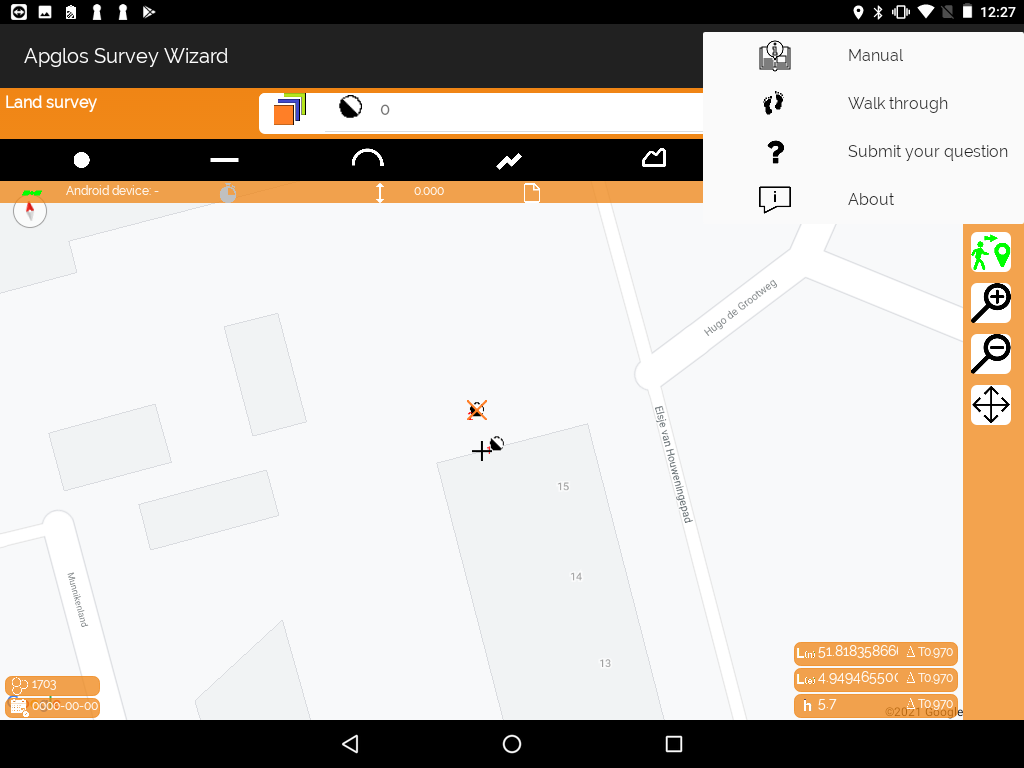
1. Click the Information menu ![]() in the top right of your screen
in the top right of your screen
2. Click ‘Manual’ in the menu
3. Now you are in the manual
You can start the walkthrough in the Information menu by following the next steps:
1. Click the Information menu ![]() in the top right of your screen
in the top right of your screen
2. Click ‘Walkthrough’ in the menu
3. Select what item you want to walk through:
– Configure
– Land survey
– Save
– Stake out
4. Indicate the type of walkthrough
5. Click the V-button to confirm
6. Take the walkthrough
You can ask a question in the Information menu by walking through the next steps:
1. Click the Information menu ![]() in the top right of your screen
in the top right of your screen
2. Click ‘Submit your question’ in the menu
3. Type your question
4. Click the envelope to confirm
You can only use the Apglosapp offline with a time license. When you purchased this you can use the app offline by following these steps:
1. Click the Profile menu ![]() in the top right of your screen
in the top right of your screen
2. Click ‘Coins’ in the menu
3. Click ‘yes’ next to the offline icon ![]() (the box will turn orange)
(the box will turn orange)
4. Click the V-button to confirm
You can turn on/off the GIS mode in the File menu by following the next steps:
1. Click the ![]() icon and click other settings
icon and click other settings ![]() in the File menu
in the File menu
2. Click ‘off’ next to the GIS icon to turn off the GIS option (the box will turn orange)
3. Click ‘on’ next to the GIS icon to turn on the GIS option (the box will turn orange)
4. Click the V-button to confirm
You can add a layer with GIS attributes in the Screen menu by following the next steps:
1. Click the ![]() icon and click ‘land survey’ in the menu
icon and click ‘land survey’ in the menu
2. Click the layer manager button ![]()
3. Enter the name of the layer
4. Adjust the color as needed
5. Adjust the line type as needed
6. Adjust the line weight as needed
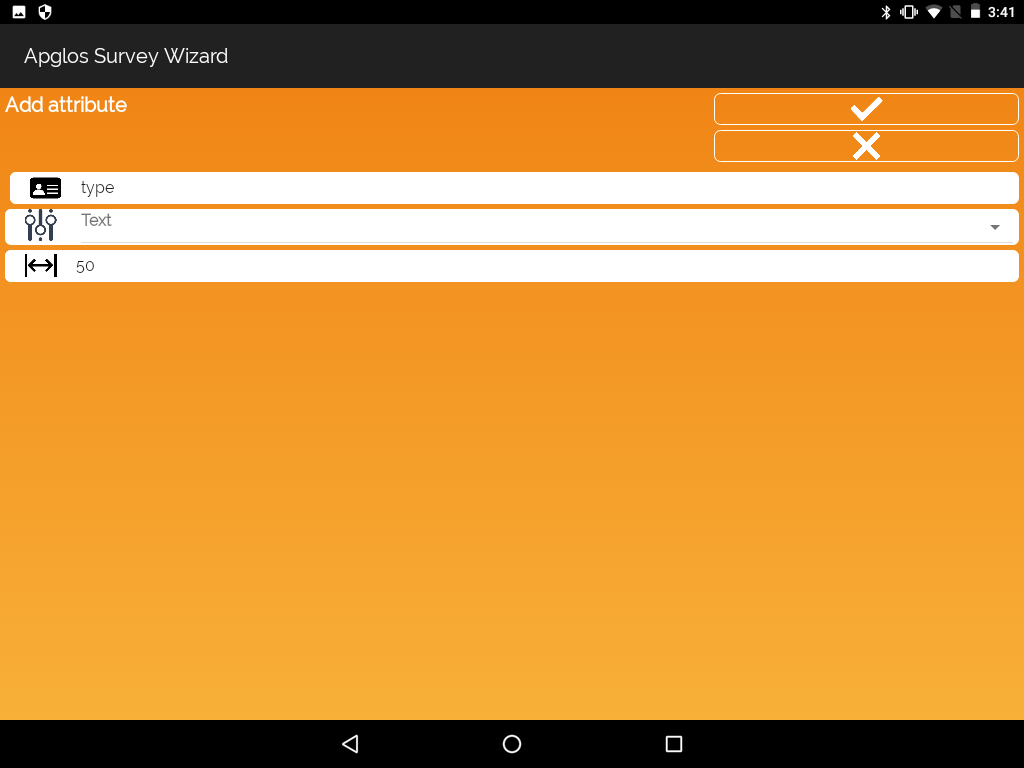
7. Repeat the next steps until all attributes are added:
– Click the ![]() icon
icon
– Enter the name of the attribute next to the ![]() icon
icon
– Select the type of attribute
– Indicate the maximum length of the GIS attribute
– Indicate the maximum number of decimal places
– Click the V-button to confirm
8. Select for which type of object the GIS attributes must be entered
9. Click the V-button to confirm
You can map an object with GIS attributes in the Screen menu by following the next steps:

1. Click the ![]() icon and click ‘land survey’ in the menu
icon and click ‘land survey’ in the menu
2. Click the layer manager button ![]()
3. Click a measure button (point, line, polyline or surface)
Repeat the next steps for all attributes:
– Click the bar next to the attributes name
– Select de attribute value or select custom to enter it yourself
– If ‘custom’ is selected, enter the value
– Click the V-button to confirm
You can the GIS attributes of an object in the Screen menu by following the next steps:
1. Click the ![]() icon and click ‘draw’ in the menu
icon and click ‘draw’ in the menu
2. Select the option ‘change attributes’
3. Click the button ‘draw’
Repeat the next steps for all attributes, that needs to be changed:
– Click the bar next to the attributes name, that needs to be changed
– Select de attribute value or select custom to enter it yourself
– If ‘custom’ is selected, enter the value
– Click the V-button to confirm
You can save an AGL file in the File menu by following the next steps:
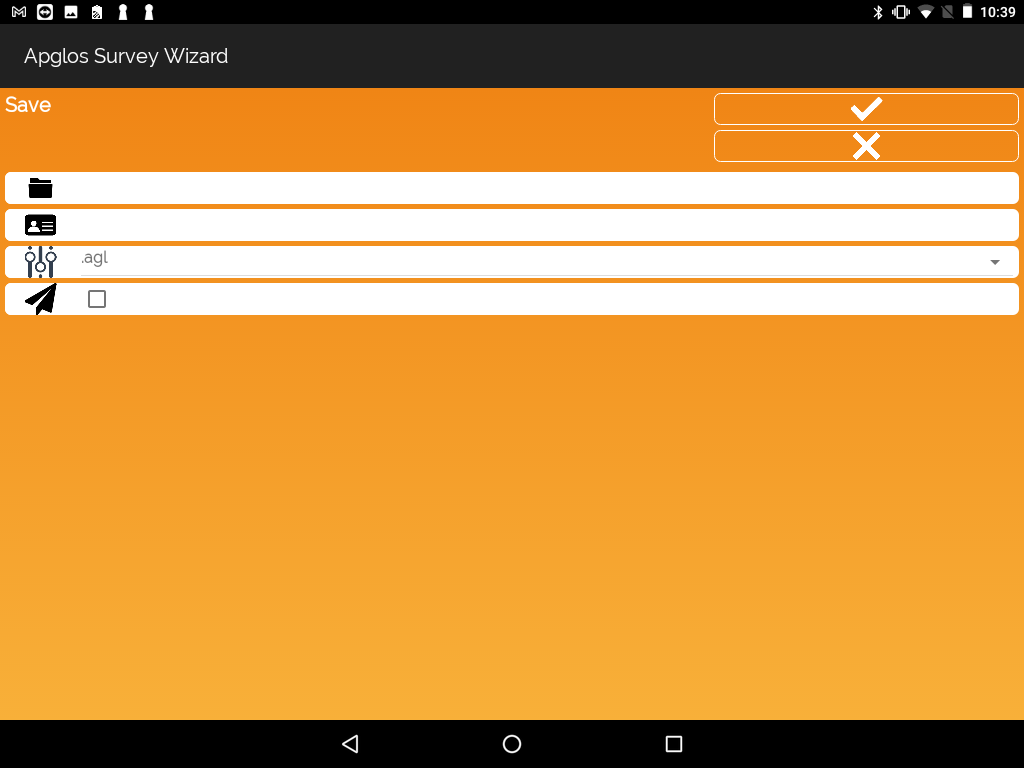
1. Click the ![]() icon and click ‘save’
icon and click ‘save’ ![]() > in the menu
> in the menu
2. Select AGL next to the ![]() icon for saving your data to an AGL file
icon for saving your data to an AGL file
3. Click next to the ![]() icon
icon
4. You will be forwarded to a screen where you can select your AGL file
5. Select the folder in which the needed file is located
6. Click ‘select’ on the bottom right of your screen
7. Click next to the ![]() icon and enter the name of the file
icon and enter the name of the file
8. Click the V-button to confirm
9. Check the box next to the plane if you want to send the file directly
10. Click the V-button to confirm and your AGL file is saved
You can save an AGP file in the File menu by following the next steps:
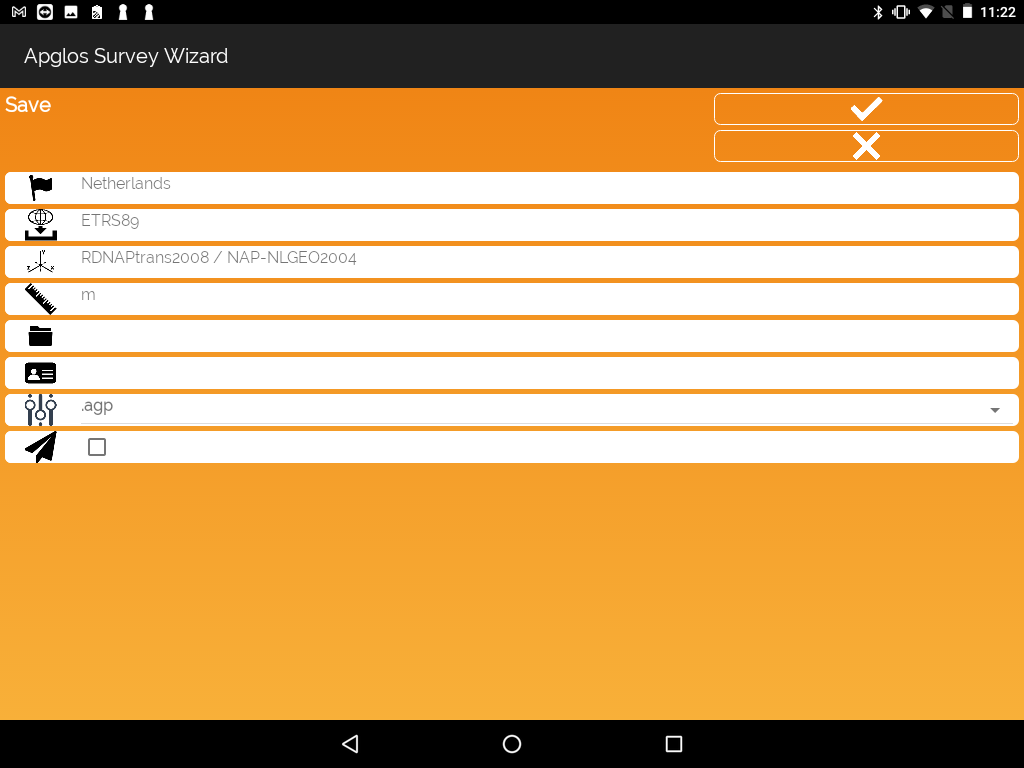
1. Click the ![]() icon and click ‘save’
icon and click ‘save’ ![]() in the menu
in the menu
2. Select AGP next to the ![]() icon for saving your data to an AGP file
icon for saving your data to an AGP file
3. Make sure the coordinate system is well set up. You can change the coordinate system in ‘other settings’
4. Click next to the ![]() icon
icon
5. You will be forwarded to a screen where you can select your AGL file
6. Select the folder in which the needed file is located
7. Click ‘select’ on the bottom right of your screen
8. Click next to the ![]() icon and enter the name of the file
icon and enter the name of the file
9. Click the V-button to confirm
10. Check the box next to the plane if you want to send the file directly
11. Click the V-button to confirm and your AGL file is saved
You can save a KML file in the File menu by following the next steps:

1. Click the ![]() icon and click ‘save’
icon and click ‘save’ ![]() in the menu
in the menu
2. Select KML next to the ![]() icon for saving your data to a KML file 3. Click next to the
icon for saving your data to a KML file 3. Click next to the ![]() icon
icon
4. You will be forwarded to a screen where you can select your KML file
5. Select the folder in which the needed file is located
6. Click ‘select’ on the bottom right of your screen
7. Click next to the ![]() icon and enter the name of the file
icon and enter the name of the file
8. Click the V-button to confirm
9. Check the box next to the plane if you want to send the file directly
10. Click the V-button to confirm and your KML file is saved
You can save a PDF file in the File menu by following the next steps:
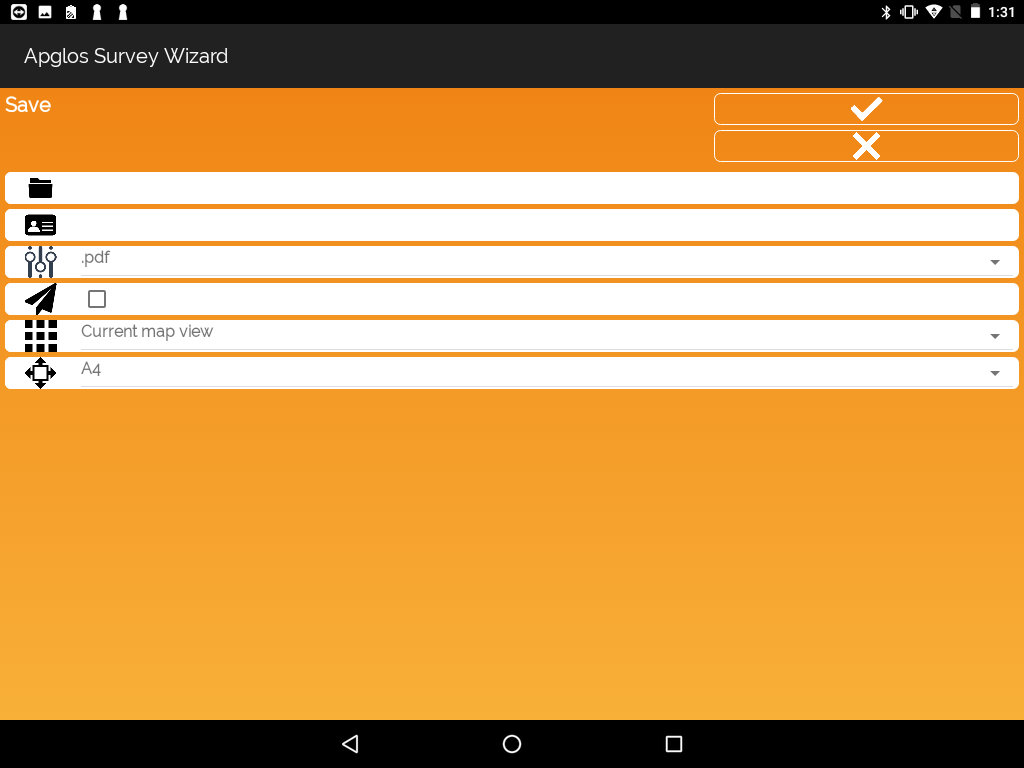
1. Click the ![]() icon and click ‘save’
icon and click ‘save’ ![]() in the menu
in the menu
2. Select PDF next to the ![]() icon for saving your data to a PDF file
icon for saving your data to a PDF file
3. Click next to the ![]() icon
icon
4. You will be forwarded to a screen where you can select your PDF file
5. Select the folder in which the needed file is located
6. Click ‘select’ on the bottom right of your screen
7. Click next to the ![]() icon and enter the name of the file
icon and enter the name of the file
8. Click the V-button to confirm
9. Check the box next to the plane if you want to send the file directly
10. Select next to the ![]() icon whether you want to print the complete drawing or just the currant map view
icon whether you want to print the complete drawing or just the currant map view
11. Select the print size next to the ![]() icon
icon
12. Click the V-button to confirm and your PDF file is saved
You can save a XML file in the File menu by following the next steps:

1. Click the ![]() icon and click ‘save’
icon and click ‘save’ ![]() in the menu
in the menu
2. Select XML next to the ![]() icon for saving your data to a XML file 3. Make sure the coordinate system is well set up. You can change the coordinate system in ‘other settings’
icon for saving your data to a XML file 3. Make sure the coordinate system is well set up. You can change the coordinate system in ‘other settings’
4. Click next to the ![]() icon
icon
5. You will be forwarded to a screen where you can select your XML file
6. Select the folder in which the needed file is located
7. Click ‘select’ on the bottom right of your screen
8. Click next to the ![]() icon and enter the name of the file
icon and enter the name of the file
9. Click the V-button to confirm
10. Check the box next to the plane if you want to send the file directly
11. Click the V-button to confirm and your XML file is saved
You can save a XYZ file in the File menu by following the next steps:

1. Click the ![]() icon and click ‘save’
icon and click ‘save’ ![]() in the menu
in the menu
2. Select XYZ next to the ![]() > icon for saving your data to a XYZ file
> icon for saving your data to a XYZ file
3. Make sure the coordinate system is well set up. You can change the coordinate system in ‘other settings’
4. Click next to the ![]() icon
icon
5. You will be forwarded to a screen where you can select your XYZ file
6. Select the folder in which the needed file is located
7. Click ‘select’ on the bottom right of your screen
8. Click next to the ![]() icon and enter the name of the file
icon and enter the name of the file
9. Click the V-button to confirm
10. Check the box next to the plane if you want to send the file directly
11. Click the V-button to confirm and your XYZ file is saved
You can open a BCA file in the File menu by following the next steps:
1. Click the ![]() icon and click ‘open’ in the menu
icon and click ‘open’ in the menu
2. A question appears: “Do you want to save the current survey information?”
3. Click ‘no’ to be forwarded and open a BCA file
4. Click next to the ![]() icon
icon
5. Select the folder in which the needed file is located
6. Click ‘select’ on the bottom right of your screen
7. Click next to the ![]() icon and select the needed BCA file
icon and select the needed BCA file
8. Click the V-button to confirm
9. Your BCA file is now opened
You can open an AGL file in the File menu by the next steps:
1. Click the ![]() icon and click ‘open’ in the menu
icon and click ‘open’ in the menu
2. A question appears: “Do you want to save the current survey information?”
3. Click ‘no’ to be forwarded and open an AGL file
4. Click next to the ![]() icon
icon
5. Select the folder in which the needed file is located
6. Click ‘select’ on the bottom right of your screen
7. Click next to the ![]() icon and select the needed AGL file
icon and select the needed AGL file
8. Optionally, check the box to overwrite the block definitions
9. Optionally, check the box to overwrite the line type definitions
10. Optionally, check the box to overwrite the text style definitions
11. Click the V-button to confirm
11. Your AGL file is now opened
You can open an AGP file in the File menu by following the next steps:
1. Click the ![]() icon and click ‘open’ in the menu
icon and click ‘open’ in the menu
2. A question appears: “Do you want to save the current survey information?”
3. Click ‘no’ to be forwarded and open an AGP file
4. Click next to the ![]() icon
icon
5. Select the folder in which the needed file is located
6. Click ‘select’ on the bottom right of your screen
7. Click next to the ![]() icon and select the needed AGP file
icon and select the needed AGP file
8. Click the V-button to confirm
9. Your AGP file is now opened
You can open an KML file in the File menu by following the next steps:
1. Click the ![]() icon and click ‘open’ in the menu
icon and click ‘open’ in the menu
2. A question appears: “Do you want to save the current survey information?”
3. Click ‘no’ to be forwarded and open an KML file
4. Click next to the ![]() icon
icon
5. Select the folder in which the needed file is located
6. Click ‘select’ on the bottom right of your screen
7. Click next to the ![]() icon and select the needed KML file
icon and select the needed KML file
8. Click the V-button to confirm
9. Your KML file is now opened
You can open a XML file in the File menu by following the next steps:
1. Click the ![]() icon and click ‘open’ in the menu
icon and click ‘open’ in the menu
2. A question appears: “Do you want to save the current survey information?”
3. Click ‘no’ to be forwarded and open a XML file
4. Click next to the ![]() icon
icon
5. Select the folder in which the needed file is located
6. Click ‘select’ on the bottom right of your screen
7. Click next to the ![]() icon and select the needed XML file
icon and select the needed XML file
8. Optionally, adjust the multiplication factor from the units to meters
9. Optionally, adjust the coordinate system to the coordinates of the file
10. Click the V-button to confirm
11. Your XML file is now opened
You can open a SHP file in the File menu by following the next steps:
1. Click the ![]() icon and click ‘open’ in the menu
icon and click ‘open’ in the menu
2. A question appears: “Do you want to save the current survey information?”
3. Click ‘no’ to be forwarded and open a SHP file
4. Click next to the ![]() icon
icon
5. Select the folder in which the needed file is located
6. Click ‘select’ on the bottom right of your screen
7. Click next to the ![]() icon and select the needed SHP file
icon and select the needed SHP file
8. Optionally, adjust the multiplication factor from the units to meters
9. Optionally, adjust the coordinate system to the coordinates of the file
10. Click the V-button to confirm
11. Your SHP file is now opened
You can open an XYZ file in the File menu by following the next steps:
1. Click the ![]() icon and click ‘open’ in the menu
icon and click ‘open’ in the menu
2. A question appears: “Do you want to save the current survey information?”
3. Click ‘no’ to be forwarded and open a XYZ file
4. Click next to the ![]() icon
icon
5. Select the folder in which the needed file is located
6. Click ‘select’ on the bottom right of your screen
7. Click next to the ![]() icon and select the needed XYZ file
icon and select the needed XYZ file
8. Optionally, adjust the multiplication factor from the units to meters
9. Optionally, adjust the coordinate system to the coordinates of the file
10. Click the V-button to confirm
11. Your XYZ file is now opened
You can use the quick buttons in the File menu by following the next steps:
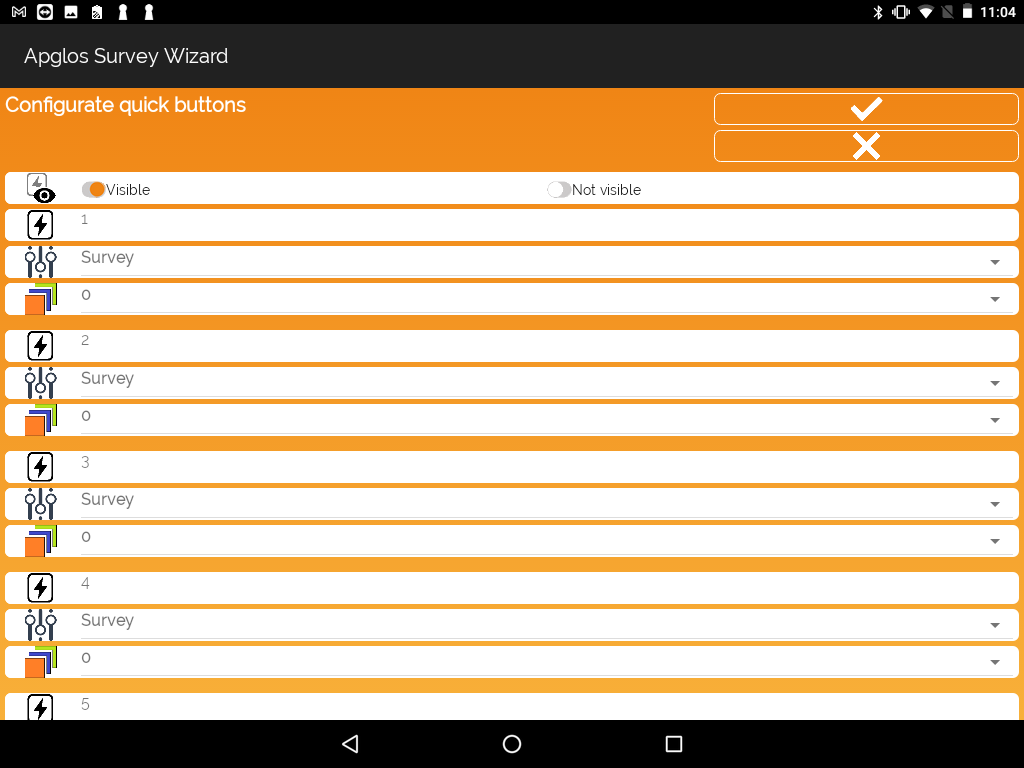
1. Click the ![]() icon and click ‘other settings’
icon and click ‘other settings’ ![]() in the menu
in the menu
2. Click the button ![]() to be forwarded to the quick buttons menu
to be forwarded to the quick buttons menu
3. Set the quick buttons to ‘visible’
4. Optionally, adjust the option for the quick button
5. Optionally, adjust the layer for the quick button
6. Repeat the last two steps for each required quick button
7. Click the V-button to confirm
8. Use the buttons on the left side of the land survey screen to measure object faster in the correct layer
You can change the height of a point in the Screen menu by following the next steps:
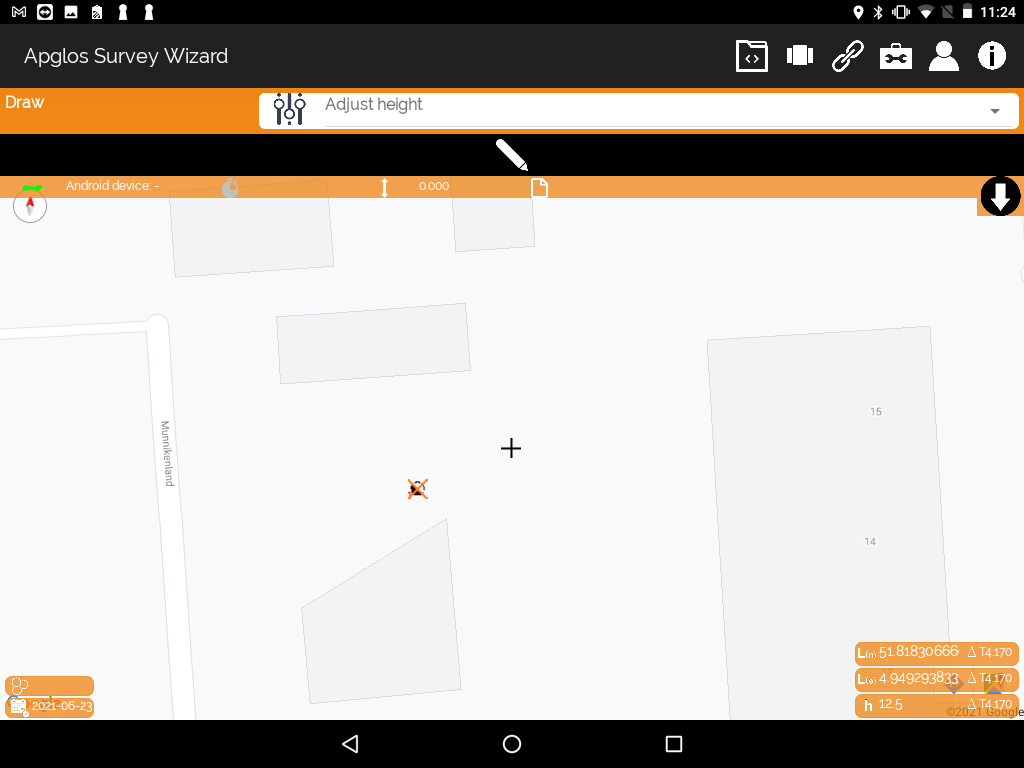
1. Start by selecting the point you want to adjust
2. Click the ![]() icon and click ‘draw’ in the menu
icon and click ‘draw’ in the menu
3. Select ‘adjust height’ next to the ![]() icon
icon
4. Click the button with pencil icon ![]()
5. Adjust the height as needed
6. Click the V-button to confirm
You can change a type of a point in the Screen menu by following the next steps:
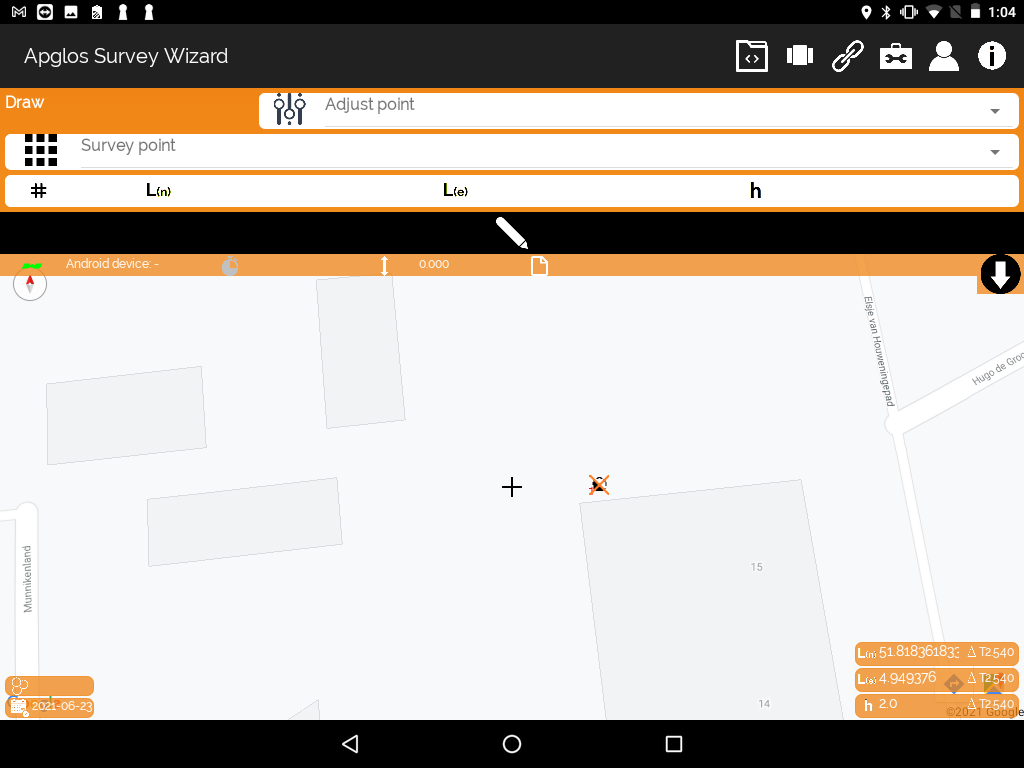
1. Start by selecting the point you want to adjust
2. Click the ![]() icon and click ‘draw’ in the menu
icon and click ‘draw’ in the menu
3. Select ‘adjust point’ next to the ![]() icon
icon
4. Select which type the point should be adjusted to
5. Click the button with pencil icon ![]()
6. If you have chosen a comment, enter the value as when adding a comment
7. Click the V-button to confirm
8. If you have chosen a symbol, enter the value as when adding a symbol
9. Click the V-button to confirm